Clear, concise understanding between architects, engineers, construction professionals, facility managers, and owners is the key to any successful project. To be on the same page, you have to be in the same book or, in the case of building, the same model. Autodesk building information modeling (BIM) software solutions provide teams with tools to keep information coordinated, up-to-date, and accessible in an integrated environment.
These videos, articles, and white papers provide detailed information about the advantages of BIM—for predicting a building’s real-world performance before construction, creating sustainable designs, increasing efficiency, enabling new ways of working, and more.
Click on the link below to read more articles on BIM
http://usa.autodesk.com/adsk/servlet/index?siteID=123112&id=9970899
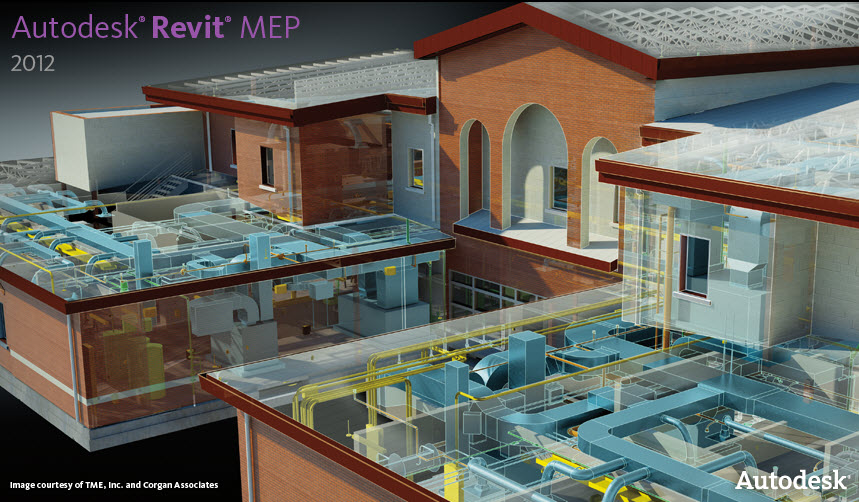
Revit MEP
Thursday, December 27, 2007
The USGBC Drives Green Growth
The U.S. Green Building Council (USGBC) currently has over nine LEED rating systems covering commercial and residential buildings, interiors, and exteriors, all the way up to entire neighborhoods, and several more systems are on the way. Even as LEED continues to proliferate, however, a movement continues among USGBC leadership to make it more unified, scientifically rigorous, and regionally appropriate. First discussed at the Greenbuild Conference in 2006, USGBC announced at Greenbuild 2007 that it would continue to move LEED toward a “bookshelf” of credits while incorporating both structural and technical changes. At the same time, weighting of environmental priorities, life-cycle assessment (LCA), and regional credits all promise to affect LEED and its point structure.

Whereas the original rating system applied only to new construction and was drafted with commercial office towers in mind, LEED has grown so much in popularity and use that new rating systems have been specifically created for different kinds of buildings. There are now LEED standards for existing buildings (focusing on energy-efficient maintenance and nontoxic operations); core and shell (exterior walls and windows, electrical and plumbing systems); commercial interiors (doors and walls, lighting and plumbing fixtures); homes (only for new construction in its pilot phase) and neighborhood developments (for example, a redevelopment zone).
Like any young industry, LEED is evolving rapidly. Lessons learned from pilot projects are used to improve the next version of the standard. Work is now under way on the 3.0 version, which will attempt to assess the environmental impact of a product or material over its complete lifecycle. It’s a difficult and important task, and whatever emerges is guaranteed to generate controversy. But once again, by providing a framework, language, and measurement system for lifecycle analysis, LEED will fuel conversations and spur market growth.
BIM for Sustainable Design
Building information modeling facilitates complex processes and analyses that were previously too laborious or expensive to perform. This white paper details how Autodesk's purpose-built BIM solution supports key aspects of sustainable design and "green" certification.
Using BIM for Greener Designs in the Future
When I was at Autodesk University this year, they showed us this video on where the future might take us to giving us "on-the-fly" LEED ratings of a building as design changes and design options are created and modified allowing architects and engineers to find better ways to make a building more efficient.
Designing a Greener Building
The LEED (Leadership in Energy and Environmental Design) Green Building Rating System is a national standard for developing resource-smart, sustainable buildings. As adoption of the standard grows, many owner/operators are requiring that their new building projects achieve LEED certification, which rates a project based on site design, indoor environmental quality, and efficient use of energy, materials, and water. A high LEED rating recognizes the quality of a green building design and also qualifies the project for an array of state and local government financial incentives – an important benefit for the building owner.
Complex engineering analysis of the design project is critical to achieving LEED certification. Some design firms outsource engineering analysis - as it is time-consuming and costly to do in-house. But now, building information modeling solutions such as the Revit Architecture and Revit MEP provide design models containing the necessary level of detail for the analyses. Design data can be extracted from the building information model and input to various analysis programs. With the recent release of the Green Building Studio from GeoPraxis, Inc., this process has been streamlined to the point where architects and engineers can perform energy analysis in-house, reducing the overall cost of the design process.
Autodesk and the USGBC are committed to a future where design process and technology are integrated in support of our common goal - a sustainable tomorrow. Over the past year, the “Project Chicago:Green Research” team investigated how modeling, analysis, and sustainable validation could converge into an improved design process. Using scenarios from BNIM Architects’ Lewis and Clark State Office Building in Missouri, a research team of experts developed alternative concepts for sustainable design environments and studied their impact on the design process. This video showing the results of this research suggests a compelling future.
Autodesk and the USGBC plan to work on several initiatives to make sustainable design easier and more efficient through the use of technology such as the Autodesk Revit platform for building information modeling (BIM), ultimately reducing the causes of climate change by increasing the number of green buildings that emit less carbon dioxide. As the first step, Autodesk and the USGBC plan to develop an educational curriculum for architecture and engineering students.
As part of the agreement, USGBC and Autodesk will explore opportunities to integrate Autodesk’s technology with the USGBC’s Leadership in Energy and Environmental Design (LEED) Green Building Rating System, to help the building industry more easily and rapidly meet goals for reduced carbon dioxide emissions. Potential areas for collaboration may include consulting, joint development of new technology initiatives and industry education. To facilitate rapid adoption of sustainable design practices, Autodesk and the USGBC plan to share the knowledge and results of their partnership with the building industry.
This video may include information concerning future technology, but is not intended to reflect any planned or future development efforts or be a promise or guarantee of future delivery of products, services or features.
Click here to download an Autodesk Whitepaper about Greener Designs
The cornerstone of BIM is the high-quality design information it provides. This paper delves into a practical example of how architects can use this information to quickly and accurately perform energy analysis on early-stage building designs, for data that supports construction of "green" buildings.
Wednesday, December 26, 2007
Setting up a Revit MEP Project from the Revit Architecture Project
With any software program, different users use it in different ways. All of the methods and documentation has always been gears towards architects and how they should use the software. But what about the engineers? They use a different workflow than architects. Is the software capable of performing tasks much easier than documented for engineers?
When engineers get the architectural background in a Revit project format, how can you, and how should you create a new MEP project based off of the architectural views for that particular project? Every project is unique, and requires new views to be created. Architects start their projects using a project template, as should engineers. But the same MEP views will need to be created based off of the various Architectural views and levels that the project requires. Why recreate all of that when it's already in a Revit project?
This blog describes a method where you can have the best of both worlds. You can use the architects project to create the MEP views the project requires rather than creating all of those views a second time yourself as the engineer. Then you can transfer your MEP project standards such as family types, line weights, materials, view templates and object styles into your project.
- Open the Architects model. Switch to the Default 3D view and erase all of the elements, switch to a few of the floor plan views to confirm all elements have been deleted.
- Use the Purge Unused (FILE->Purge Unused) command to remove all of the Architects “stuff” that is no longer needed.
- Use the Transfer Project Standards command to transfer the Family Types, line weights, materials, View Templates, Filters, and object styles and any other settings that you have changed in the template.
- Switch to a floor plan view and from the File pulldown and pick Import/Link ->Revit. Browse to the Architects model and link it in. Make sure to use Origin-to-Origin as the Positioning setting.
- Select the views that you would like to use for your MEP plans and go to the view properties and modify what view template you want to apply to that view. Or you can use the Apply View Template command from the Right-click menu. This will apply your MEP view template that view.
- With the views still selected, Right-click again and select Properties. Change the Discipline catagory to whatever discipline you want that view to apply to, and also set the Sub-Discipline.
- You can copy those views and apply other discipline view templates and descipline catagories to them if you are a multi-discipline MEP firm.
- Switch to a Floor Plan, and here you can turn off unwanted elements such as furniture. Type VG to start the visibility graphics. You can also control the elements in the Architects Model separately from the elements in your model by going to the Revit Links tab. One example for doing this would be to turn off the Architects plumbing fixtures after placing your Revit MEP fixtures that have connectors on them.
- Use the Monitor option from the Copy/Monitor design panel and select the levels to copy from the Architects linked file to your MEP file.
- Repeat this step for each of the levels, pick Finish mode when all of the levels have been selected.
- Select the button under Display Settings, and choose Custom. Under the Basics tab change the Linked view: to a view in the Architects model that looks the way you want. Then switch to the Model Categories set the Model Categories to Custom and turn off elements you do not want to see.
Now you have the start of your MEP project. You can now begin to lay out your equipment and create your systems. When the architect sends you a new background and you replace the old version with the new version, your project link will update the background. You can then use the Coordination Review tool from the Tools Pulldown menu to see what changes were made. If new levels or views were created, you will need to create new MEP views to display those changes.
In any design software program, that are multiple ways to get similar tasks completed. This is just one way that you can start a project in Revit MEP.
Thursday, December 20, 2007
Problem Creating Deployment image with Last Revit Build
When you tried to create a Revit product deployment image with a build number of 20071109_2345, you received the following error message:
user cancelled installation
This error is caused by outdated DLL files on the system.
To correct this issue, you need to download and install the Microsoft Visual C++ 2005 SP1 Redistributable Package. During the installation of this package, updated DLL files will be copied to the system. After the installation, you will be able to create the deployment.
Friday, November 30, 2007
Interoperability of software in the construction industry
This is something I read that I found really interesting. It’s a long article, but I summed it up below. This is something that I see with our customers right now, and how they are re-drawing projects because of the inability or reluctance to share data.
The link to read the full article is here.
-Scott Brisk
Interoperability is the ability to manage and communicate electric product and project data among collaborating firms such as architects, engineers, contractors, owners and building product manufactures. Also the ability to implement and manage collaborative relationships among members of cross-disciplinary build teams that enables integrated project execution. If all members of a build team can freely exchange data across different applications and platforms, every member of the team can better integrate the project delivery.
Interoperability issues are gaining attention with the increased use of BIM. In order to optimize the use of BIM, it is critical that the BIM data be shared between build team members. As a result, interoperability of technology is an important factor. Re-entering data from a BIM into another application or platform used by the build team creates wasteful and costly duplication.
About 3% of project costs are related to software non-interoperability. As construction values have risen to record high levels, productivity within the industry has come under scrutiny. The industry generally perceives lack of interoperability as an impediment to improving productivity.
Conventional delivery methods have often promoted a divide between build team members, as work is handed off from one member to the next throughout the process. As team members work closely together during the design phases, they have a greater ability to impact costs before the project progresses into the construction phases. In order to reap the full benefits of BIM’s ability to promote integrated project delivery, build team members will increasingly need to have interoperable solutions.
While industry groups are often working toward the same interoperability goals, these groups are sometimes following different paths to a solution. A majority of the industry lists software incompatibility issues as the primary factor impacting build team members ability to share information across software.
As a significant portion of the industry adopts BIM and explores its uses, concern over interoperability isuues will grow. If a limited number of firms use BIM, the need to seamlessly share data between BIM and other applications being used on the team remains in important issue.
Interoperability within the built environment will be achieved through a combination of solutions spurred by people and technology. As build team members create and reference these data-rich models, the advantages of sharing data between disciplines become clearer. With adoption of BIM heading toward a tipping point in 2008, more users of this technology may seek solutions that facilitate data exchange. Competitive pressure could drive this dynamic. Build team members believe their competitors may be adopting BIM more quickly than they are. To avoid the risk of falling behind, more firms will adopt BIM and possibly push its limits to create their own competitive advantages.
While use of BIM is on the rise, looming legal issues threaten its use within an interoperable environment. As a new technology, there are limited legal and contractual frameworks to clearly define liability. BIM offers a dynamic exchange of data, yet within the legal community contracts are often established using language based on 2D drawings. In some contract language, if there are discrepancies between electronic files and printed files, the printed files govern. Within a model-sharing environment, data need to flow from one party to the next electronically with all parties trusting their accuracy. Without a framework to allay concerns about indemnity in such an environment, build team members will remain hesitant to collaborate using BIM. (Patrick J. O”Connor, Jr., “Productivity and Innovation in the Construction Industry; The Case for Building Information Modeling.” Pp. 35-41)
Conclusions
- BIM Experience will breed awareness and drive demand.
- Owners increasingly will take leadership roles
- Users will lead the way to define tangible benefits of interoperability
- Universal interoperability between all applications will not be the near-term solution
- Major software companies will respond to market demand for interoperable solutions, but at their pace
- This environment will spawn unprecedented entrepreneurial opportunity. Companies who can think of cost justification and user requirements, and these technology firms who do not have the baggage of legacy data structures and installed foundation to support targeted solutions that come out of the box, will be ready to enable existing tools to play nice with others.
Tuesday, November 20, 2007
New Visa Lighting Families

I had the opportunity to work with Visa Lighting and taught them how they can create Revit Families for their entire product line. The challenge that we had was that they already had all of their fixtures drawn in SolidWorks. So we exported them out as ACIS Solids, and Imported them into Revit MEP and added connectors. We also worked on creating Revit Parameters for these families so that the electrical information will work with Revit MEP and it's electrical settings.
Visa Lighting offers a comprehensive BIM product library. The BIM files contain meta-data to assist in energy, sustainability, and photometric calculations. BIM also removes the barriers between design and collaboration; projects proceed smoothly as errors are reduced or eliminated, less waste of resources and time result in improved, superior projects of superior quality. Our dedication to the design community dictates we assume a leadership role in extending the graphic capabilities of this powerful tool.
Download the Content Here
Download the Content Here
Friday, November 16, 2007
Revit MEP 2008 New Build - 11/9/2007
Web Update Enhancement List
Improvements made in the Web Update #3 build (20071109_2345):
Improvements made in the Web Update #3 build (20071109_2345):
- Consistent Electrical Fixture insertion behavior after creating Electrical Fixture schedules.
- Improves performance when placing Callouts on MEP models in certain situations.
- Allows the ability to array face-based families placed on a vertical face.
- Allows the ability to maintain face-based instances on curved surfaces of a Revit link when the link is unloaded.
- Improves stability when selecting Sections.
- Allows the ability to insert an electrical receptacle into a legend view.
- Improves stability when accessing the Help menu in Revit MEP on a computer with the Microsoft Windows Vista operating system.
- Improves stability when applying a view template to a sheet.
- Improves performance when views contain many objects with overridden graphics by element.
Thursday, November 15, 2007
Additional Revit MEP Content
I would like to let everybody know that Autodesk has just released their Revit MEP Content Extension on their website. There's more MEP content that needs to be built, but this is a step in the right direction. The Revit MEP® Content Extension provides new content for Revit MEP users. Both Imperial and Metric versions of the content are available for download below, in ZIP format. After download, users can then uncompress the file to the desired content location.
Before You Download
The content files are compressed with their path information included back to the root directory of the folder structure installed with Revit® MEP 2008 Web Update #2. For example, in a default installation of Imperial content, the ZIP file would be uncompressed at:
C:\Documents and Settings\All Users\Application Data\Autodesk\RME 2008\Imperial Library
In this situation, all files will be uncompressed to the correct folders.
Click Here to Download
New Content Added
Air Curtains
- Electric Air Curtains
- Steam Air Curtains
Air Seperators
- Air Separator-Scoop-1-in.-1-1_4-in.
- Air Separator-Scoop
- Flanged Tangential Air Separator
- Tangential Air Separator-Inline-Flange
- Tangential Air Separator-Inline-Threaded
- Threaded Tangential Air Separator
- Vortex Air Separator
Air TerminalsDiffusers
- Circular Louver Face Ceiling Diffuser Rectangular
Circular Louver Face Ceiling Diffuser Round
Linear Slot Diffusers
Perforated Face Rectangular Neck Ceiling Diffusers
Perforated Face Round Neck Ceiling Diffusers
Simple Linear Slot Diffuser
Rectangular Diffuser - Round Neck - HostedGrilles
Ceiling Return Air Grilles with Trim
Rectangular Return Grille - Square Neck - Hosted 2
Rectangular Return Grille - Square Neck - Hosted 3
Rectangular Exhaust Grille - Square Neck - HostedRegisters
Rectangular Floor Register
Boilers
- 212-475 MBH Modular Gas-Fired Cast-Iron Boiler
Firetube Boilers
Watertube Boilers
Condensing Condensing Boiler
Gas-Fired Cast-Iron 1186 MBH Gas-Fired Cast-Iron Boiler
Gas-Fired Cast-Iron 1248-1310 MBH Gas-Fired Cast-Iron Boiler
Gas-Fired Cast-Iron 1435-1560 MBH Gas-Fired Cast-Iron Boiler
Gas-Fired Cast-Iron 321-562 MBH Gas-Fired Cast-Iron Boiler
Gas-Fired Cast-Iron 624-811 MBH Gas-Fired Cast-Iron Boiler
Gas-Fired Cast-Iron 874-1123 MBH Gas-Fired Cast-Iron Boiler
Chillers
- Centrifugal Chillers
Centrifugal Chiller
Centrifugal ChillersAbsorption Chillers
Direct-Fired Absorption Chiller
Single-Stage Absorption Chiller
Two-Stage Absorption ChillerRotary Chillers
Air Cooled Rotary Chillers
110-125-ton Water Cooled Rotary Liquid Chiller
125-225-ton Water Cooled Helical Rotary Chiller
250-325-ton Water Cooled Helical Rotary Chiller
350-450-ton Water Cooled Helical Rotary Chiller
70-100-ton Water Cooled Rotary Liquid ChillerScrew Chillers
Water Cooled Screw Chiller - 300 to 550 Tons
Air Cooled Screw Chiller - 80 to 500 TonsScroll Chillers
Air-Cooled Chiller
20-ton Condenserless Scroll Chiller
20-ton Water Cooled Scroll Chiller
25-ton Condenserless Scroll Chiller
25-ton Water Cooled Scroll Chiller
30-ton Condenserless Scroll Chiller
30-ton Water Cooled Scroll Chiller
Classroom Air Conditioners
Classroom Air Conditioners
Coils
- Electric Air Heating Coil
Hydronic Air Cooling Coil
Hydronic Air Heating Coil
Large Coils
Medium Coils
Small CoilsCondensers
Air-Cooled Condensers
- 17-265 MBH Small Horizontal Air-Cooled Condenser
17-265 MBH Small Vertical Air-Cooled Condenser
301-455 MBH Large Horizontal Air-Cooled Condenser
614-1819 MBH Large Horizontal Air-Cooled Condenser
Evaporative Condensers
1327-1969 MBH Evaporative Condenser
2135-3171 MBH Evaporative Condenser
3316-4270 MBH Evaporative Condenser
4062-6322 MBH Evaporative Condenser
6425-9970 MBH Evaporative Condenser
- Evaporative Fluid Cooler
Counterflow Cooling Tower
Induction Cooling Tower
Cyclones
Cyclone Dust Collector
Dampers
- Opposed Blade Dampers
Parallel Blade Dampers
Balancing Dampers
Rectangular Balancing Damper
Motorized Control Damper
Round Balancing Damper
Fire Dampers
Round Fire Dampers
Rectangular Fire Damper
Economizers
- Economizer
Modular Economizer
Fans
- Belt Drive Fans
Cabinet Ceiling Fans
Direct Drive Fans
Fan Module Front Discharge Up
Fan Module Rear Discharge Up
Fan Module Side Discharge
Propeller Fans
Rooftop Upblast Fans
Sidewall Exhaust Fans
Tubular Inline Fans
Fan Coil Units
Filters
- Angle Filters
Bag Filters
Cartridge Filters
Flat Filters
Rack-Mounted Water Filter
Sand Filter
Wall-Mounted Water Filter
Fire Protection
- Dry Sprinklers
Upright Dry Sprinkler
Fire Department Inlet Connections
2-Way Flush FD Connection Outlet Body
2-Way Flush FD Inlet Connection Plate
3-Way Flush FD Connection Outlet Body
3-Way Flush FD Inlet Connection Plate
2-Way FD Inlet Connection Body
3-Way FD Inlet Connection Body
2-Way Projecting FD Inlet Connection
3-Way Projecting FD Inlet Connection
Single Flush FD Inlet Connection
Fire Detection and Alarm Equipment
- Alarm Pressure Switch
Water Flow Indicator
Water Motor Alarm
Hose Cabinets
Recessed Hose Rack Cabinet
Semi-Recessed Hose Rack Cabinet
Surface Mounted Hose Rack Cabinet
Recessed Hose Reel Cabinet
Semi-Recessed Hose Reel Cabinet
Surface Mounted Hose Reel Cabinet
Hose Connections
Gate Valve Hose Connection
Globe Valve Hose Connection - Sprinklers
- Tanks
- Retard Chamber
Valves
- Alarm Check Valve
Deluge Valve
Dry Pipe Valve
Pressure Operated Relief Valve
Fume Hoods
- Ductless Bench Fume Hood
Exhaust Fume Hood Station
Grease Hoods
Grease Hood-Backshelf
Grease Hood-Compensating- Island Style-Bottom Discharge
Grease Hood-Compensating- Island Style-Front_Bottom Discharge
Grease Hood-Compensating-Island Style-Front Discharge
Grease Hood-Compensating-Wall Style-Bottom Discharge
Grease Hood-Compensating-Wall Style-Front and Bottom Discharge
Grease Hood-Compensating-Wall Style-Front Discharge
Grease Hood-Exhaust Only-Island Style-Tapered End
Grease Hood-Exhaust Only-Island Style
Grease Hood-Exhaust Only-Wall Style-Tapered
Grease Hood-Exhaust Only-Wall Style
Grease Hood-Short Circuit-Island Style
Grease Hood-Short Circuit-Wall Style
Oven and Range Hoods
Oven_Condensate Hood
Range Hood - Ducted - Rear Rectangular Duct
Range Hood - Ducted - Top Rectangular Duct
Range Hood-Duct Free
Range Hood-Ducted-Top Round Duct
Furnaces
- Furnace
Gauges
- Pressure Gauge
Temperature Gauge
Heat Exchangers
- Shell and Tube Heat Exchangers
Heat Pumps
- Single Packaged Heat Pumps
Split System Heat Pumps
Water Source Heat Pumps
Heaters
- Cabinet Unit Heaters
Horizontal Concealed Cabinet Unit Heater
Vertical Cabinet Unit Heater
Vertical Concealed Cabinet Unit Heater
Humidifiers
Louvers
- Eight inch Pitch Extruded Louver
Extruded Louver
Storm Resistant Louver
Mixing Boxes
Intakes
Mixing Boxes
Modular Air Handling Units
AHU Coils
AHU Economizers
Economizer
AHU Fans
Fan Module Front Discharge Up
Fan Module Rear Discharge Up
Fan Module Side Discharge
AHU Filters
Angle Filters
Bag Filters
Cartridge Filters
AHU Inspection Modules
Large Inspection Module
Medium Inspection Module
Small Inspection Module
AHU Intakes
AHU Intakes
AHU Mixing Boxes
Packaged Air Handlers
Pressure Regulators
Hand Knob Operated Pressure Regulator
Wrench Operated Pressure Regulator
Pumps
- Close Coupled End Suction Pumps
Horizontal Centrifugal Pump Template
Horizontal Pressure Operated Condensate Pump
Horizontal Split Case Pumps
Inline Pumps
Inline Vertical Pump Template
Vertical Pressure Operated Condensate Pump
Roof Mounted AC Units
- Electric Roof Mounted AC Units
Gas Fired Roof Mounted AC Units
Split System Air Handlers
Air Handler Unit Template
Steam Traps
Inverted Bucket Steam Trap
Strainers
- Basket Strainers
Y Strainer
Suction Diffusers
Tanks
- Condensate Receiver
Fuel Tank
Horizontal Storage Tank
Vertical Storage Tank
Expansion Tanks
Combination Expansion Tank
Freestanding Horizontal Expansion Tank
Freestanding Vertical Expansion Tank
In-Line Expansion Tank
Mixing Tanks
Cone Bottom Mixing Tank
Dish Bottom Mixing Tank
Valves
- Ball Valves
Butterfly Valves
Venturi Flow Meter
Pressure Relief Valve
Gate Valves
Lever Balancing Valve
Solenoid Valve - .25 - .375
Solenoid Valve - .5 - 3
Threaded Cap Relief Valve
Vacuum Breaker Backflow Valve
Y Globe Balancing Valve Elbow
Y Globe Straight Balancing Valve - Sizes .5 - 2
Y Globe Straight Balancing Valve - Sizes 2.5 - 12
3-Way Valves
3-Way Valves
3-Way Control Valves-Motor
Check Valves
Check Valves
Backflow Preventer
Double Swing Check Valve Horizontal - 2.5 - 6
Double Swing Check Valve Horizontal - 8 - 10
Double Swing Check Valve Vertical - 2.5 - 6
Double Swing Check Valve Vertical - 8 - 10
Check Valve-Flange
Check Valve-Wafer
Circuit Setter Valves
Circuit Setter-1_2-in-2-in
Circuit Setter-2-1_2-in - 4-in
Diaphragm Valves
Diaphragm Valve-Straight Through-Flange
Diaphragm Valve-Straight Throuth-1_2-in-2-in
Y Diaphragm Valve - Flanged
Y Diaphragm Valve - Threaded
Weir Type Diaphragm Valve
Globe Valves
Globe Valves
Globe Valve-Flange
Motor Controlled Valves
0.5 - 1.0 Inch Motor Controlled Valve
1.25 - 6 Inch Motor Controlled Valve
8 - 12 Inch Motor Controlled Valve
Plug Valves
Plug Valve-Lever Handle
Plug Valve-1_2-in-2-in
Plug Valve-3-Way-1_2-in-2-in
Plug Valve-3-Way-Gear Operator
Plug Valve-3-Way-Lever Handle
Plug Valve-Gear Operator
Pressure Regulating Valves
Pressure Regulating Flanged Valve
Pressure Regulating Threaded Valve
Triple Duty Valves
Flanged Triple Duty Valve
Threaded Angle Triple Duty Valve
Threaded Triple Duty Valve
Triple Duty-Flanged Angle
VAV Units
- Outlet Plenums
Outlet Plenum Cross
Outlet Plenum Double Wye
Outlet Plenum Left Elbow
Outlet Plenum Left Wye
Outlet Plenum Right Elbow
Outlet Plenum Right Wye
Outlet Plenum Tee
Outlet Plenum Transition
VAV Boxes
- Dual Duct VAV
Parallel Fan Powered VAV
Series Fan Powered VAV
Single Duct VAV Box
VAV Reheat Coils
Reheat Water Coil
Vertical Fan Coil UnitsVertical Fan Coil Units
Wednesday, October 10, 2007
Displaying Revit MEP Systems by Color

If you look at your Revit MEP model, and you see the confusing winding of piping and duct running through your model, and wonder what system that pipe or duct belongs to? There are ways to show your systems in various colors to make it easier to understand and view your model at a quick glance. You can set up a filter to apply colors by System Type, or by System Name, whatever you want. Check out the Filters applied to the default template in RME 2008 as a guide.
 Line Styles by Pipe Type
You need to use View Filters to accomplish this task.
 1. Settings -> Filters... Here you define the Filters that will exist in the project.
 2. Select a view in the Project Browser that you want to apply these filters on, go to Properties -> Visibility Graphics Overrides... -> Filters tab. Here you will select a filter you defined in step 1 and define visual overrides for elements that are returned by the filter.
 3. Go to that view, note that your Filters have been applied and there is a visual difference between your systems.
Keep in mind that Filters can be part of a View Template, so you don't need to define these for each individual view.

Monday, October 01, 2007
Building Information Modeling in Practice
A White Paper from Autodesk
Introduction to Building Information Modeling
Introduction to Building Information Modeling
Building information modeling—an innovative new approach to building design, construction, has changed the way industry professionals worldwide think about how technology can be applied to building design, construction, and management.
Building information modeling supports the continuous and immediate availability of project design scope, schedule, and cost information that is high quality, reliable, integrated, and fully coordinated. Among the many competitive advantages it confers are:
Building information modeling supports the continuous and immediate availability of project design scope, schedule, and cost information that is high quality, reliable, integrated, and fully coordinated. Among the many competitive advantages it confers are:
- Increased speed of delivery (time saved)
- Better coordination (fewer errors)
- Decreased costs (money saved)
- Greater productivity
- Higher-quality work
- New revenue and business opportunities
For each of the three major phases in the building lifecycle—design, construction, and management—building information modeling offers access to the following critical information:
- In the design phase—design, schedule, and budget information
- In the construction phase—quality, schedule, and cost information
- In the management phase—performance, utilization, and financial information
The ability to keep this information up to date and accessible in an integrated digital environment gives architects, engineers, builders, and owners a clear overall vision of their projects, as well as the ability to make better decisions faster—raising the quality and increasing the profitability of projects.
Although building information modeling is an approach and not a technology, it does require suitable technology to be implemented effectively. Examples of some of these technologies, in increasing order of effectiveness, include:
Although building information modeling is an approach and not a technology, it does require suitable technology to be implemented effectively. Examples of some of these technologies, in increasing order of effectiveness, include:
- CAD
- Object CAD
- Parametric Building Modeling
This paper will describe what building information modeling is, how it confers competitive advantages, and how it can be achieved using a flexible range of technologies.
What Is Building Information Modeling, and What Are Its Key Benefits?
Building information modeling is an approach to building design, construction, and management. It supports the continuous and immediate availability of project design scope, schedule, and cost information that is high quality, reliable, integrated, and fully coordinated. Though it is not itself a technology, it is supported to varying degrees by different technologies.
Building information modeling is, essentially, the intersection of two critical ideas:
- Keeping critical design information in digital form makes it easier to update and share and more valuable to the firms creating and using it.
- Creating real-time, consistent relationships between digital design data—with innovative parametric building modeling technology—can save significant amounts of time and money and increase project productivity and quality.
What follows is a more detailed look at how building information modeling works, as well as the benefits it offers in the design, construction, and management phases of the building lifecycle.
Building Information Modeling Benefits in the Design Phase
During the course of a building project, an architect must balance the project scope, schedule, and cost. Using building information modeling techniques, all of this critical information is immediately available, so that project-related decisions can be made more quickly and effectively.
Building information modeling allows a project team to make changes to the project at any time during the design or documentation process without laborious, low-value recoordination and manual checking work. This gives the team more time to work on design and other high-value architectural problems. In addition, all of the building design and documentation work can be done concurrently instead of serially, because design thinking is captured at the point of creation and embedded in the documentation as the work proceeds.
Whenever a change is made to a project, all the consequences of that change are automatically coordinated throughout the project. The automatic coordination of changes offered by building information modeling eliminates coordination mistakes, improves the overall quality of the work, and helps companies win more repeat business.
Building Information Modeling Benefits in the Construction Phase
In the construction phase of the building lifecycle, building information modeling makes available concurrent information on building quality, schedule, and cost. The builder can accelerate the quantification of the building for estimating and value-engineering purposes and for the production of updated estimates and construction planning. The end result is that more of the owner’s construction dollar goes into the building than into administrative and overhead costs.
Building Information Modeling Benefits in the Management Phase
In the management phase of the building lifecycle, building information modeling makes available concurrent information on the use or performance of the building; its occupants and contents; the life of the building over time; and the financial aspects of the building. Building information modeling provides a digital record of renovations and improves move planning and management. Physical information about the building, such as finishes, tenant or department assignments, furniture and equipment inventory, and financially important data about leasable areas and rental income or departmental cost allocations are all more easily managed and available. Consistent access to these types of information improves both revenue and cost management in the operation of the building.
Potential for New Services and Revenue Sources
When building information modeling is used effectively, architects can make use of a project's digital design data to provide new services and gain new sources of income. Owners are increasingly demanding digital models, and paying for them. Architects can also offer new and expanded services—such as move management, energy analysis, digitally integrated cost estimating, and renovation phase planning—for additional fees.
What Technologies Can Be Used to Implement Building Information Modeling?
Although building information modeling is an approach and not a technology, it does require suitable technology to be implemented effectively. Examples of some of these technologies, in increasing order of effectiveness, include
The gray line in the chart represents CAD-based software; that is, software that is based on the familiar geometry-based CAD technology used in the industry for several decades. This technology supports drafting automation very effectively and with little effort. However, to achieve increasing levels of efficiency, this technology requires greater and greater levels of effort. Higher levels of administrative and management overhead are introduced, layer and naming standards must be maintained and enforced, and the quality of the information coming from the CAD-based files depends heavily on the discipline and reliability of the users entering the data. Very high levels of effort, including programming and partner product development, can achieve effectiveness in the building information modeling range. However, the level of effort required is so high that CAD-based technology is rarely used at this level.
Object CAD Technology
Object CAD seeks to simulate building components in a CAD-based environment, focusing on the 3D geometry of the building, the generation of 2D documentation from that 3D geometry, and the extraction of object data from the building components to provide information about quantities and object properties. This technology can be applied very effectively to help coordinate the various representations of the building in documentation, and because it carries rich data about the building in the object structure, it can also be extended into building information modeling.
Object CAD technology also allows for great variety in levels of use, and because it is based on CAD, it can be particularly easy to implement—and often yields immediate benefits—with little or no process change. However its effectiveness remains contingent on user discipline and reliability, and it cannot ensure the presence of the high-quality, reliable, integrated, and fully coordinated information required for the highest levels of building information modeling benefits.
Parametric Building Modeling Technology
Parametric building modeling combine a data model (geometry and data) with a behavioral model (change management) that gives meaning to the data through relationships. This provides an integrated system that can be used to simulate the behavior of a real-world system—in this case, a building. Examples of the most advanced features of this kind of system are real-time self-coordination of the information in every view, and the assurance of the quality of the information coming from the system.
Some other important characteristics of software based on parametric building modeling technology include:
Only a purpose-built integrated data architecture built around a parametric building model can provide the immediate and fully coordinated representation of a project across all views, drawing sheets and schedules that is necessary to eliminate errors and provide clarity and confidence in decision making.
Autodesk offers products based on all three building design and documentation technologies, and fully understands the pros and cons of each. Parametric building modeling technology is uniquely suited to supporting the highest level of building information modeling effectiveness at the lowest level of effort. Parametric building modeling uniquely offers the concurrent and immediate availability of all of the important information about the building that results in higher quality work, greater speed and productivity, and decreased costs. However, this technology requires the wholesale adoption of building information modeling to put it to use. There is no way to use this technology in a traditional, non-building information modeling environment. Using this technology can deliver tremendous business benefits, but doing so requires a departure from traditional ways of working. Moving from CAD-based technology to object CAD technology can be an incremental or evolutionary change, but moving to parametric building modeling technology for building information modeling requires a new way of working.
Building Information Modeling Benefits in the Design Phase
During the course of a building project, an architect must balance the project scope, schedule, and cost. Using building information modeling techniques, all of this critical information is immediately available, so that project-related decisions can be made more quickly and effectively.
Building information modeling allows a project team to make changes to the project at any time during the design or documentation process without laborious, low-value recoordination and manual checking work. This gives the team more time to work on design and other high-value architectural problems. In addition, all of the building design and documentation work can be done concurrently instead of serially, because design thinking is captured at the point of creation and embedded in the documentation as the work proceeds.
Whenever a change is made to a project, all the consequences of that change are automatically coordinated throughout the project. The automatic coordination of changes offered by building information modeling eliminates coordination mistakes, improves the overall quality of the work, and helps companies win more repeat business.
Building Information Modeling Benefits in the Construction Phase
In the construction phase of the building lifecycle, building information modeling makes available concurrent information on building quality, schedule, and cost. The builder can accelerate the quantification of the building for estimating and value-engineering purposes and for the production of updated estimates and construction planning. The end result is that more of the owner’s construction dollar goes into the building than into administrative and overhead costs.
Building Information Modeling Benefits in the Management Phase
In the management phase of the building lifecycle, building information modeling makes available concurrent information on the use or performance of the building; its occupants and contents; the life of the building over time; and the financial aspects of the building. Building information modeling provides a digital record of renovations and improves move planning and management. Physical information about the building, such as finishes, tenant or department assignments, furniture and equipment inventory, and financially important data about leasable areas and rental income or departmental cost allocations are all more easily managed and available. Consistent access to these types of information improves both revenue and cost management in the operation of the building.
Potential for New Services and Revenue Sources
When building information modeling is used effectively, architects can make use of a project's digital design data to provide new services and gain new sources of income. Owners are increasingly demanding digital models, and paying for them. Architects can also offer new and expanded services—such as move management, energy analysis, digitally integrated cost estimating, and renovation phase planning—for additional fees.
What Technologies Can Be Used to Implement Building Information Modeling?
Although building information modeling is an approach and not a technology, it does require suitable technology to be implemented effectively. Examples of some of these technologies, in increasing order of effectiveness, include
- CAD
- Object CAD
- Parametric building modeling
The gray line in the chart represents CAD-based software; that is, software that is based on the familiar geometry-based CAD technology used in the industry for several decades. This technology supports drafting automation very effectively and with little effort. However, to achieve increasing levels of efficiency, this technology requires greater and greater levels of effort. Higher levels of administrative and management overhead are introduced, layer and naming standards must be maintained and enforced, and the quality of the information coming from the CAD-based files depends heavily on the discipline and reliability of the users entering the data. Very high levels of effort, including programming and partner product development, can achieve effectiveness in the building information modeling range. However, the level of effort required is so high that CAD-based technology is rarely used at this level.
Object CAD Technology
Object CAD seeks to simulate building components in a CAD-based environment, focusing on the 3D geometry of the building, the generation of 2D documentation from that 3D geometry, and the extraction of object data from the building components to provide information about quantities and object properties. This technology can be applied very effectively to help coordinate the various representations of the building in documentation, and because it carries rich data about the building in the object structure, it can also be extended into building information modeling.
Object CAD technology also allows for great variety in levels of use, and because it is based on CAD, it can be particularly easy to implement—and often yields immediate benefits—with little or no process change. However its effectiveness remains contingent on user discipline and reliability, and it cannot ensure the presence of the high-quality, reliable, integrated, and fully coordinated information required for the highest levels of building information modeling benefits.
Parametric Building Modeling Technology
Parametric building modeling combine a data model (geometry and data) with a behavioral model (change management) that gives meaning to the data through relationships. This provides an integrated system that can be used to simulate the behavior of a real-world system—in this case, a building. Examples of the most advanced features of this kind of system are real-time self-coordination of the information in every view, and the assurance of the quality of the information coming from the system.
Some other important characteristics of software based on parametric building modeling technology include:
- Information about the entire building and a complete set of design documents are stored in an integrated database. All of the information is parametric and therefore completely interconnected.
- Any change to the relationships among objects is always instantly reflected throughout the rest of the project—in all representations of the project.
- All relationships within the model are available for user definition—not just relationships (such as a window hosted by a wall) that have been preprogrammed by the developers. This includes graphical definition by the end user of parametric objects.
Only a purpose-built integrated data architecture built around a parametric building model can provide the immediate and fully coordinated representation of a project across all views, drawing sheets and schedules that is necessary to eliminate errors and provide clarity and confidence in decision making.
Autodesk offers products based on all three building design and documentation technologies, and fully understands the pros and cons of each. Parametric building modeling technology is uniquely suited to supporting the highest level of building information modeling effectiveness at the lowest level of effort. Parametric building modeling uniquely offers the concurrent and immediate availability of all of the important information about the building that results in higher quality work, greater speed and productivity, and decreased costs. However, this technology requires the wholesale adoption of building information modeling to put it to use. There is no way to use this technology in a traditional, non-building information modeling environment. Using this technology can deliver tremendous business benefits, but doing so requires a departure from traditional ways of working. Moving from CAD-based technology to object CAD technology can be an incremental or evolutionary change, but moving to parametric building modeling technology for building information modeling requires a new way of working.
Monday, September 17, 2007
Virtual Memory Management
A critical factor in the speed and performance of your computer is the amount of Random Access Memory (RAM) that is installed. Even a computer with a fast CPU can run slowly without the proper amount of RAM.
When it comes to evaluating the amount of computer memory needed for you to work effectively, you must balance cost and speed. As a result, different types of computer memory are used for different purposes. For example, a hard drive is a slow but inexpensive type of memory. So hard drive memory is ideal for storing massive amounts of program data and information that is not frequently accessed. RAM is a fast and expensive type of memory used to store program information for applications (or processes) that are being run.
In some cases, it is possible that the RAM on your system could be completely utilized. When this happens, the lower priority information stored in RAM is moved to the slower hard drive space (page file space) to create more space in RAM for higher priority information. This process of shuffling data back and forth in order to free up RAM is called paging and this method of managing RAM is referred to as Virtual Memory (VM). VM is measured by combining RAM and page file space.
Using VM is faster than storing information on a hard drive, but it is slower than using physical RAM. The more RAM that is installed on a computer, the less likely it is that VM will be used.
Verify Page File Space Settings
To verify page file space settings
- On the Start menu, click Settings > Control Panel.
- In Control Panel, double-click System.
- In the System Properties dialog box, click the Advanced tab.
- On the Advanced tab, under Performance, click Settings.
- In the Performance Options dialog box, click the Advanced tab.
- On the Advanced tab, under Virtual Memory, click Change.
- In the Virtual Memory dialog box, change the Initial and Max values to 4092.
- Click Set.
- Click OK to close each dialog box.


Will Your Computer Benefit from Additional RAM?
- While working in Revit, right-click on the Windows Task Bar at the bottom of the screen. Click Task Manager.
- On the Performance tab, under Commit Charge, look at the Peak Number.

This represents the peak amount of RAM that was used since last rebooting your machine (in kilobytes). If this number is higher than the total physical RAM on your system, then your system is using all of the installed RAM as well as the page file space. So if you install more RAM, your system will run faster.
Performance checks should be repeated periodically.
Does Revit need more RAM?
- Open your Revit project and minimize the Revit session.
- Right-click on the Windows Task Bar at the bottom of the screen. Click Task Manager.
- In the Windows Task Manager, click on the Processes tab.
- If the VM Size column is not displayed on the Processes tab, click Select Columns on the View menu.
- In the Select Columns dialog box, select the Virtual Memory Size check box. Click OK.
- Sort the processes by clicking on the VM Size column header. Locate the Revit process.


Compare the Revit VM Size to the amount of physical RAM on the computer. If the Revit VM Size is less than the amount of physical RAM on the computer, adding more RAM may (or may not) be beneficial. However, if the Revit VM Size is 1.5GB or it exceeds the amount of physical RAM on the computer, then adding more memory will improve Revit performance.
Conclusion
Installing additional RAM might help some users increase their productivity while using Revit, but in most cases the Revit system requirements are sufficient.
For more information on installing additional RAM, contact your IT person or hardware distributor.
Tuesday, September 11, 2007
Revit MEP Content Changes: What You Need to Know
With the release of the Web Update #2 for the Revit MEP 2008 software application, there has been a re-structuring of the Imperial Content Library that is installed with the application. There are two main components to the re-structuring. 
Plumbing Folder
The Plumbing folder has been renamed to Plumbing Components. There has been a restructuring of the Plumbing folder, as highlighted in Error! Reference source not found. below.

- Re-Organization of the Folder Structure
- New Naming Conventions
These changes have been made to allow Families to be more easily located, and also to provide a more consistent naming convention to apply to similar types of Families.
In order to manage these changes, there are recommendations for the installation process that are outlined in the What to Do section of this document.
What to Do
There are two recommended ways to handle the installation of content from the Web Update #2 build, depending on the customization you have applied to the standard catalog.
If You Have Modified Your Content Catalog
The recommended way to manage this change is to manually move your existing Content Catalog, usually found at C:\Documents and Settings\All Users\Application Data\Autodesk\RME 2008, before installation of the Web Update #2 build. During installation, download and install the new content to your desired location. This will allow for the new folder structure and content naming to be installed cleanly, avoiding the confusing situation of having both old and new families contained in your Content Catalog. After installation is complete, you need to move your customized Families into the newly installed Folder Structure, or move the installed Families into your customized Content Catalog.
If You Have Not Modified Your Content Catalog
The recommended way to manage this change is to manually delete your existing Content Catalog, usually found at C:\Documents and Settings\All Users\Application Data\Autodesk\RME 2008, before installation of the Web Update #2 build. This will allow for the new folder structure and content naming to be installed cleanly, avoiding the confusing situation of having both old and new Families contained in your Content Catalog.
Folder Structure Changes
Electrical Folder
The Electrical folder has been renamed Electrical Components. There have been three changes made to the contents of the Electrical folder, as highlighted below in Figure 1.
- The Devices folder has been broken into a Data Devices and Power Devices folder.
- The Annotation folders have been moved to the Electrical folder found in the top-level Annotations folder.
- The Equipment folder has been broken into three sub-folders; Panelboard,
Switchboard, and Transformer.

FIGURE 1 - ELECTRICAL FOLDER CHANGES
Fire Protection Folder
There have been no changes to the Fire Protection folder.
Mechanical Folder
The Mechanical folder has been renamed to Mechanical Components. There have been a number of changes made to the Mechanical folder, as highlighted below in Figure 2.

FIGURE 2 - MECHANICAL FOLDER CHANGES
- The Air Handling Equipment folder has been removed, and its families distributed to new folders depending on the type of Family.
- The Duct Fittings folder has been moved to the new top-level folder named Duct. The Duct folder contains Fittings as well as Accessories that can be placed directly on Ducts.
- The General Components folder has been removed, and the Families it contained distributed according to their type. The Connector Families were moved to the Air-Side
Components\Air Terminals folder, and the remaining Families were moved to the Duct\Accessories folder. - The Heating Equipment folder has been removed, and the Families it contained distributed according to their type.
- The Unitary Equipment folder has been removed, and the Families it contained were moved to the Air-Side Components\Air Conditioners folder.
- The Air-Side Components folder has been created to assist in understanding the purpose of the Families found in the Mechanical Components folder. All Families in these folders produce air, although they may consume things like electricity, hot water, steam, chilled water, etc.
- The General Components folder has been created for Families that do not fall under Air-Side or Water-Side classifications. Examples of these are Condensing Units or Heat Pumps, which produce refrigerant.
- The Water-Side Components folder has been created to assist in understanding the purpose of the Families found in the Mechanical Components folder. All Families in these folders produce liquids, typically water, although they may consume other things like gas or electricity.
Pipe Folder
There have been no changes to the Pipe folder.
There have been no changes to the Pipe folder.
Plumbing Folder
The Plumbing folder has been renamed to Plumbing Components. There has been a restructuring of the Plumbing folder, as highlighted in Error! Reference source not found. below.

FIGURE 3 - PLUMBING FOLDER CHANGES
- The Bathroom & Kitchen Fixtures folder has been removed, and the Families it contained distributed to new folders in the Fixtures folder depending on their type.
- The Drainage Equipment folder has been removed, at the Families it contained distributed to the Fixtures\Drains folder.
- The Emergency Fixtures folder has been moved to the Fixtures folder.
- The Pumps folder has been moved to Mechanical Components\Water-Side Components\Pumps folder, as these Families produce water.
- The Water Supply Equipment folder has been removed, and the Families it contained distributed to new folders according to the Family type.
Naming Conventions
As there are situations where there are multiple Families of the same type, we have established a more uniform naming convention across Family names. The first section of a Family name is the type of Family, for example Supply Diffuser, Floor Drain, or Sink. This allows for Families of the same type to be more logically grouped together when viewed in list form. The remaining sections of the Family name further define the characteristics of that Family.
Second New Build for Revit MEP 2008
This update is made available to registered users of Revit MEP 2008, and is subject to the terms and conditions of the end-user license agreement that appears during installation. The install will look to see if there is a previous installation of Revit MEP 2008 on the computer, and if there is, it will uninstall it before it installs the new build.
What you might want to do is copy the individual Revit.ini files in case any additional paths have been created per user. The Revit.ini file is located in - C:\Program Files\Revit MEP 2008\Program. Use this method for new builds, not new versions…i.e. 2008 to 2009 (or 2008.1 if that comes out).
What you might want to do is copy the individual Revit.ini files in case any additional paths have been created per user. The Revit.ini file is located in - C:\Program Files\Revit MEP 2008\Program. Use this method for new builds, not new versions…i.e. 2008 to 2009 (or 2008.1 if that comes out).
Improvements made in the current Web Update #2 build (20070829_2300):
- Room Tags on Copy/Monitored Rooms no longer return question marks in certain situations.
- Improves stability when using the Split Tool on Pipes or Ducts.
- Multiple Sprinkler Systems can now be copied more consistently.
- Improves stability when modifying the shape of an Elbow with an open end.
- The length override for Duct Transitions remains consistent after changes to the connected layout.
- Improves stability when generating ductwork from a mirrored air system.
- Improves stability when demolishing a duct with two connected takeoffs.
- Improves stability after receiving a corrupt element warning when opening a project.
- Publish to DWF™functions when Rooms are present and are clipped by the viewport.
- Improves stability when saving a Project with a linked DWG™file that contains an image.
- Improves stability when applying a view template to a sheet view.
- Working on Windows Vista™operating system, allows the ability to write to revit.ini, licpath.lic, KeyboardShortcuts.txt, and the Journals folder.
- Line-based families contained in a group are no longer flipped when the group is mirrored.
- Improves stability when importing group into Titleblock family.
- Allows the ability to export renderings to TIFF format.
- When temporary dimension text too small to read, user can adjust the size of the font through Revit.ini.
- Linked DWG file added by another user will now show up in Manage Links after reload latest.
- "Relative" spot elevation updates automatically with the change in Level elevation.
- When exporting to DWG file, overlapping lines that share a point are no longer missing in the resulting DWG.
Friday, August 24, 2007
Tip When Creating Revit MEP Content
There are various family's that come out of the box with Revit MEP, and they work well when placed directly in an architectural model. But most consultants will link an architectural project into their MEP project, and element hosted families don't insert well into linked files.
For example, you cannot place a ceiling-hosted family on a linked ceiling or a wall-hosted family in a wall. The ceiling or wall needs to actually exist in the "host" model for you to be able to host a Light Fixture on it. This is how element hosting works in Revit.
The solution here is to use a Face-hosted Light Fixture family. Revit can detect the face of a ceiling through a link and therefore the Lighting Fixture can be hosted on that face.
Second, element-hosted families will be deleted if the linked element host is deleted. This is not true for Face-Hosted families. Face-Hosted families will be unhosted if their host face is deleted. which makes them sit in 3D space where they were originally. You can then re-host them to another face if you'd like.
So if you are creating your own MEP families, use a Face-hosted template so that your content can be placed in a linked file.
The wall-based template is for components inserted into walls. Wall components can include openings, such that when you place the component on a wall, it also cuts an opening in the wall. Some examples of wall-based components include doors, windows, and lighting fixtures. Each template includes a wall; the wall is necessary for showing how the component fits in a wall.
The ceiling-based template is for components inserted into ceilings. Ceiling components can include openings, so that when you place the component on a ceiling, it also cuts an opening in the ceiling. Examples of ceiling-based families include sprinklers and recessed lighting fixtures.
The floor-based template is for components inserted into floors. Floor components can include openings, so that when you place the component on a floor, it also cuts an opening in the floor. An example of a floor-based family is a heating register.
The roof-based template is for components inserted into roofs. Roof components can include openings, so that when you place the component on a roof, it also cuts an opening in the roof. Examples of roof-based families include soffits and fans.
The standalone template is for components that are not host-dependent. A standalone component can appear anywhere in a model and can be dimensioned to other standalone or host-based components. Examples of standalone families include columns, furniture, and appliances.
The line-based template is for creating detail and model families that use 2-pick placement similar to structural beams. For information about detail families with 2-pick placement.
The face-based template is for creating work plane-based families that can modify their hosts. Families created from the template can make complex cuts in hosts. Instances of these families can be placed on any surface, regardless of its orientation.
For example, you cannot place a ceiling-hosted family on a linked ceiling or a wall-hosted family in a wall. The ceiling or wall needs to actually exist in the "host" model for you to be able to host a Light Fixture on it. This is how element hosting works in Revit.
The solution here is to use a Face-hosted Light Fixture family. Revit can detect the face of a ceiling through a link and therefore the Lighting Fixture can be hosted on that face.
Second, element-hosted families will be deleted if the linked element host is deleted. This is not true for Face-Hosted families. Face-Hosted families will be unhosted if their host face is deleted. which makes them sit in 3D space where they were originally. You can then re-host them to another face if you'd like.
So if you are creating your own MEP families, use a Face-hosted template so that your content can be placed in a linked file.
Following are the basic kinds of family templates:
- Wall-based
- Ceiling-based
- Floor-based
- Roof-based
- Standalone
- Line-based
- Face-based
The wall-based template is for components inserted into walls. Wall components can include openings, such that when you place the component on a wall, it also cuts an opening in the wall. Some examples of wall-based components include doors, windows, and lighting fixtures. Each template includes a wall; the wall is necessary for showing how the component fits in a wall.
The ceiling-based template is for components inserted into ceilings. Ceiling components can include openings, so that when you place the component on a ceiling, it also cuts an opening in the ceiling. Examples of ceiling-based families include sprinklers and recessed lighting fixtures.
The floor-based template is for components inserted into floors. Floor components can include openings, so that when you place the component on a floor, it also cuts an opening in the floor. An example of a floor-based family is a heating register.
The roof-based template is for components inserted into roofs. Roof components can include openings, so that when you place the component on a roof, it also cuts an opening in the roof. Examples of roof-based families include soffits and fans.
The standalone template is for components that are not host-dependent. A standalone component can appear anywhere in a model and can be dimensioned to other standalone or host-based components. Examples of standalone families include columns, furniture, and appliances.
The line-based template is for creating detail and model families that use 2-pick placement similar to structural beams. For information about detail families with 2-pick placement.
The face-based template is for creating work plane-based families that can modify their hosts. Families created from the template can make complex cuts in hosts. Instances of these families can be placed on any surface, regardless of its orientation.
Monday, July 23, 2007
Best Practices for Autodesk Revit Parametric Components (Families)
Autodesk Revit Parametric Components (also referred to as Families) offer an open, graphical
system for design thinking and form making. A powerful feature in the Revit suite of products,
families help users manage data and make changes easily. This white paper examines Best Practices relating to Autodesk Revit Families.
Revit Parametric Components are called families because one family type can contain many variations. A family can be anything in Autodesk Revit software, from a table to a window to a two-dimensional representation of an anchor bolt. Any item that may need to be represented in a project can be created in a family.
A large number of predefined families are included with Revit. Manufacturers are creating Autodesk Revit Families that are available from their websites or included on product disks. Despite the availability of large family libraries, users sometimes need to create custom components for a project. This can be easily accomplished using the Autodesk Revit Family Editor; a simple graphical interface that allows users to model any object and apply the power of parametrics to that object.
Users do not need to know any programming language to create content for Autodesk Revit. Family creation is made easy through the use of templates, which are provided with the software to help users get started with families. These templates allow Revit users to focus on the geometry of the object, as they contain all the programming necessary “behind the scene”.
Autodesk Revit Families are extremely powerful because they are driven by the Revit parametric change engine. The parametric change engine enables a change made to a family to propagate throughout the entire project. Once created, a family’s parameters remain exposed and can be edited directly within the Revit project. Ultimately, it is the parameters that drive a family’s geometry. Mathematical formulas can be used in these parameters to create complicated geometry, or to drive parameters in a user defined solution (for example, using a formula in a window family that always makes the width of the window twice its height).
Revit Families also feature nested families - one family residing in another family. For example, a user might nest a door hardware family into a door family. Nested families add a level of strength and capacity to the process. Users can create a single family file that includes dozens of different options.
This paper explores the use of families in Autodesk Revit - from the basics of the Family Editor to advanced topics and considerations when using families - all of which will provide the reader with a Best Practices approach to creating parametric component families in Revit.
Design Considerations
Before creating a family in Revit, users should consider the following questions regarding their intended use of a family:
Once the basic questions listed above are considered, a user is ready to create a new family. There are three types of Autodesk Revit families:
In-place families are components that are created specifically for a single project only. They are created from within the current project, and cannot be used in other concurrent or future projects. The best time to use an in-place family over a standard component family is when creating a component unique to a specific project. For instance: a reception desk in the lobby of a law firm may have a very unique design featuring curving shapes requested by the client and finishes unique to that lobby. In this situation, an in-place family should be used because there is little chance that this custom-designed piece will be repeated in another project.
Standard component families are the most common families in Autodesk Revit, and are the focus of the remainder of this paper. Standard component families can be placed in project template files so that they preload with each new project, or they can reside in libraries to be loaded on demand.
While working in the Family Editor, users can: 1) open an existing family and modify it to suit their needs, or 2) start a new family using the appropriate template. To start a new family, choose the File pull down menu and then select New >> Family.
TIP: To save time, users should duplicate and modify a similar existing family to suit their needs instead of starting a new family from a template.
Templates
Templates for family creation are supplied with Autodesk Revit. The various templates cover a broad range of possibilities from 2D annotation objects to 3D roof-based spot lights. Each template has been pre-configured to aid in the construction of a specific object type.
Figure 1
Autodesk Revit includes many templates to create families of parametric components.
Some templates have a combination of reference planes and pre-defined parameters to guide users during creation. Family templates for hosted objects will contain a host to build from. For example, in roof-based families a portion of a roof will be exposed in the template for the user to reference as a base. Still other templates have text notes embedded in them that may define the interior and exterior faces of a wall.
Another item that is found in some family templates are controls. Controls placed in families allow the user to change the position of the geometry in a family after it’s loaded into the project. An example of these controls can be seen in a door family, where controls allow the swing and the hinge-side of the door to be reversed.
Figure 2
The template for a door family includes controls to easily reverse the swing and hinge-side of the
door..
To create a family based on a template, browse the list of templates, and choose the one most appropriate to the object being built. If the object does not fall into a specific category, the Generic Model template may be the best choice. After picking the template, the user is ready to launch the Family Editor.
Family Editor
The Family Editor is built into Revit, and is launched by opening an existing family (those with an RFA extension) or by starting a new family from within Revit. The Family Editor launches within the Revit application, and employs the same user interface. The Design Bar on the left of the drawing window changes to a unique set of tools for family creation, and the Project Browser updates to show specific views depending on template selection.
Figure 3
The Family Editor user interface matches the general Revit user interface.
At a minimum, the drawing window will display two crossing Reference Planes - and possibly some dimensions, text, and notes to the designer. The crossing Reference Planes are important because they define the origin of the family. It’s a Revit Best Practice to leave these existing items (preloaded from the family template) alone. Users should not move or delete these items, as they play an important role in the family. In fact, there are some items (such as dimensions) in some family templates that cannot be deleted by the user - underscoring the general principal that if an item is in the template when it's first opened, it should be left there.
Reference Planes
A common mistake among users is to start adding objects and solids at this point. While it’s almost time to start modeling, there is still some more preparation that will later serve a significant purpose. After opening the template, the first thing a user should do - before creating model geometry - is use Reference Planes and Reference Lines to create construction lines for the geometry that will be added later.
Start in a view that best fits the family being created, such as a plan or elevation. Reference Planes should be used as datum lines that extend beyond the edges of the visible drawing area. Drawing a reference plane (often called ref planes) in a plan view will also cause that same reference plane to be seen in a crossing elevation or section view, because it is literally a plane that extends in a horizontal and vertical direction simultaneously.
Figure 4
Reference Planes should be defined before creating geometry.
Unlike reference lines, reference planes do not have “defined” endpoints. They consist of two associated planes: one parallel to the view and one perpendicular. Ref Lines can be used in rotational control of families, because the endpoint can be constrained. Reference Lines and Planes can be renamed, so that users can easily refer to them at another time.
Creating Parameters
Reference planes that have been laid out should align with the major axes of the planned geometry. Users should begin to add dimensions to specify parametric component geometry. Start by thinking how the object should be controlled. Height, width, and depth are three dimensions often used in families, and these dimensions and parameters are pre-loaded with many of the templates. Users may need to add more dimensions to describe other geometry - for instance; trim, width, and depth are common in a Window family.
Once the dimensions have been added for the major pieces, users can start adding labels to dimensions, creating parameters. There are two categories of parameters: instance parameters and type parameters. Changing an instance parameter affects the parameters of a single entity (or instance) of an object. Changing a type parameter affects all parameters of the same type.
If there are several instances of the same family loaded into a project, and each individual representation of that family needs to be a different length, then use instance parameters. For example, consider two counter tops in the same project. One instance of the counter top is placed and its length (an instance parameter) is set to 5’ – 0”. A second counter top is placed and its length (an instance parameter) is set to 5’ – 5 ¼”, spanning the distance between two walls. The instance parameters easily allow these two counter tops to be set to different lengths. Instance parameters have another unique characteristic: dimensions that are controlled by instance parameters will display shape handles when selected in a Revit project. Shape handles allow the user to click and stretch the shape of a family to a new position or size by using the mouse.
Figure 5
Instance parameters display shape handles (shown here in blue), a convenient way to stretch the shape of a family.
Type parameters control families at a higher level. They control the predefined types of families used in the project. Use type parameters to load an object repeatedly in a project and control those repeated objects as if they were one. For example, consider a door family. A users places a door repeatedly in the model as a 6’-8” tall door, but later decides to change the height of all the doors to 7’-0”. Changing one type parameter will cause all of these doors to update their height simultaneously.
To add a parameter, click on a dimension then add a label. Once the dimension is labeled, it becomes a parameter. In the Options Bar, a drop down list of available parameters will appear. If the parameter needed is not available, select Add Parameter. When adding a new parameter, specify whether it's an instance or type parameter. After adding the parameter, the dimension changes to include the parameter name and the dimensional length.
Figure 6
Add a new parameter using the Revit Family editor.
As parameters are created, they are added to the parameter list in the Family Types dialogue box (selecting by clicking Family Types in the Design Bar). This Family Types dialogue box contains several key areas. Most noticeable is the list of defined parameters in the main window, arranged into logical parameter groups (Construction, Dimensions, and Identity Data in the example in Figure 7). During creation or editing, users can assign which category is assigned to a parameter.
Figure 7
Family parameters are listed in the Family Types dialog box.
On the right side of the dialog box, users can create new Family Types, or rename or delete existing Family Types. Revit features Family Types to predefine a set of parameters - making a particular “type” of object.
Returning to the door family as an example, several door types can be defined in this dialog box. One type might be a “3068” door (a door that is 30” wide and 6’-8” tall). Another type might be a “3668” (36” wide and 6’-8” tall). A user could then define a “3070” and a “3670” door in this dialog box. Family Types allow Revit users to quickly define a multitude of sizes and combinations of an object, based on just one family and one set of parameters.
The lower group of three buttons in the Family Types dialog box is specifically for parameter creation; Add, Modify, and Remove. Click the Add button to launch the Parameter Properties dialog box to add a parameter to this family.
Notice the Parameter Types section of this Parameter Properties dialog box (see Figure 8). There are two types of parameters available in Revit: family parameters and shared parameters. A family parameter is specific only to this particular object and its value cannot appear in a schedule or tag. A shared parameter can be shared across multiple families and projects. Its value can appear in schedules and tags, and can also be exported out to ODBC. Family parameters are stored within the family file, whereas shared parameters are saved in an external text (TXT) file, typically on a network where other users can access the text file to use the shared parameters.
Figure 8
Family parameters are listed in the Family Types dialog box.
Parameter data for a family parameter is entered in the Parameter Properties dialog box.:
To change the parameter, users can click the Modify button, or remove the parameter from the family entirely with the Remove button. Continue to add additional parameters by repeating the steps above to complete the design of the family.
Testing the Family
Before finishing a family, it’s very important to "flex" or test the model - to check that the elements created are reacting as expected when parameters change. Users should develop a habit of flexing the model repeatedly when creating families, especially after adding parameters.
To flex the model, click the Family Types button in the Design Bar. In the Family Types dialog box, the various parameters of the object are listed. Pick a parameter, and change the dimension value associated with it, then click Apply and see how the model changes. The intention is to see if the reference planes have moved to a new position as expected. Change the parameters to a range of numbers (clicking Apply each time) to test a range of values from which the family would normally operate - to assure the planes are moving to the correct lengths and dimensions.
Occasionally a user will see an error such as “Constraints not Satisfied.” This usually means that the parameter is trying to control a part that is already constrained by another parameter. As more parameters are added to the model, be sure to flex multiple parameters to test them. For instance, if flexing the width works well, then set a new width, and flex the height. Try different combinations to assure all is moving as expected.
Once a user is satisfied that reference planes, dimensions, and parameters are all working as expected, it's finally time to add some real geometry in the form of Solids and Voids.
Adding Geometry
There are several choices for creating geometry in Revit: Extrusions, Blends, Sweeps, and Revolves. These four geometry types can either be solids or voids. The type of geometry used depends on what is being modeled. For example, in a door family, the door panel itself could be an extrusion of a rectangular shape. The door frame could be a sweep - a profile in the shape of the door frame would be swept along a path defined by the sides and top of the door opening. The door knob might be a revolve. A void-blend could be used to cut the raised panel into the surface of the door panel.
The method for adding geometry is similar for all geometry types. The rest of this section will use extrusions as an example. From the Design Bar in the Family editor, choose Solid, then Extrusion. Revit will switch to Sketch Mode, and the user will have two options for sketching a shape. The first option is to draw the shape using tools from the Options Bar such as Line, Arc, Circle, Polygon, etc. The second option is to use the Pick tool from the Options Bar to pick reference planes, lines, or other existing geometry. As the user begins to draw or pick, magenta sketch lines appear. These lines could be drawn over the top of the reference planes, or more loosely sketched and then moved into alignment with the reference planes. The key is to make these sketch lines lock to the reference planes.
Using the Pick tool, the user has the option to lock the sketch lines upon placement. Blue padlock symbols will appear when lines can be locked to other geometry, lines, or reference planes. To lock and unlock relationships, simply click the lock symbol to toggle it opened (unlocked) and closed (locked). Sketch lines can be moved using a 'press and drag' technique; clicking on the line and moving the mouse while holding down the mouse button. When using this method, notice that sketch lines will automatically snap to reference planes and other relationships while being moved. Moving a sketch line off and back onto a reference plane will cause the lock symbol to appear, allowing the user to choose to lock it or not. The Align tool also allows the user to create constraints using the lock symbols.
TIP: When flexing the model, move the dialog box to the side of the screen, to better see the family in the drawing area.
After sketching the shape, and locking the sketch to the appropriate reference planes, the Extrusion properties in the Design Bar are used to define the thickness of the extrusion. This number can also be set in the Options Bar. When satisfied, click Finish Sketch and the geometry will appear. Flex the model again from various views, including 3D, to make sure the geometry behaves as expected. If it doesn’t, highlight the geometry and stretch it, using the blue shape handles that appear, to align and constrain to a reference plane.
Formulas
Formulas are one of the many powerful aspects of Revit Families - used to control families in a variety of ways. Formulas can use logic such as IF statements (IF the width is 1’-0”, set the height to 4’-0”) as well as mathematical expressions. They can be used to control Yes/No parameters, and to control parametric arrays.
Formulas are typed directly into the Family Types dialog box, where all of the parameters for a family are listed. Simply place a formula into the cell adjacent to the value, beginning with an equal sign. When entering a formula, abbreviations (such as +, *, sin, and so forth) can be used.
The following are valid formula abbreviations:
+ Addition
- Subtraction
* Multiplication
/ Division
^ Exponentiation, i.e. x^y = x raised to the power of y
log Logarithm
sqrt Square root, i.e. sqrt(16)
sin Sine
cos Cosine
tan Tangent
asin Arcsine
acos Arccosine
atan Arctangent
exp e raised to an x power
abs Absolute Value
Referring back to the family parameters listed in the Family Types dialog box in Figure 7, notice that there are parameters for height and width. In the figure, the height = 4’-0” and width = 3’-0”. To set the width of this family to always be one half the height, click in the Formula column of the width parameter and enter “=Height/2”. The values are case sensitive, and must be typed exactly as they are defined. This is why it is important, when naming parameters, to be concise about the name chosen (as described above in the Creating Parameters section). Test how formulas work by changing the value of height, and watching the width value change automatically.
There are many complex mathematical functions that can be used. Logical functions include IF, AND, OR, and NOT statements. Formulas can also use greater than/less than signs (< >). Experimenting with formulas will allow users to create some very powerful Revit Families, such as a book shelf that automatically adds support brackets as the length of the shelf increases or a window family where the muntins turn off when the window size decreases beyond a defined limit.
Saving a Revit Family
When the Revit Family is ready to be used in a project, save the family with an appropriate name, and store it in a location that is easy to find. A Best Practices tip is to organize family content into a system that mimics the Revit Library. This makes it much easier for users to find what they're looking for.
To load the family into a project, select File >> Load From Library >> Load Family, and then browse to the saved file and select it. Alternately, for many component types, when the tool is selected, a Load button becomes active in the Design Bar.
Create a keyboard shortcut to automatically open the Load Family dialog box, or click the Load button in the Options Bar for many component types such as doors and windows when the tool is selected in the Design Bar.
Once loaded into a project, the family can be moved and copied as needed. To edit the family, simply select the object, and click the Edit Family button in the Options Bar. This will launch the Family Editor and open the selected family. When finished editing, the family can be loaded directly back into the project by clicking the Load into Project button in the Design Bar. Saving the family from the Family Editor using this method will overwrite the file that was originally the source for the object in the project. Simply modifying and reloading without saving will update ONLY the project into which the family is loaded.
There are many resources available if users need assistance or are have problems with Autodesk Revit families. First, file a Support Request through the Help Menu in Revit. This puts users directly in touch with the Autodesk Revit team for assistance. The Revit Forums at AUGI.com are also an invaluable resource. Membership is free and there are thousands of people from around the world logged in 24 hours a day - ready and willing to help.
Summary
Autodesk Revit Families and the Family Editor are extremely powerful. One of the best ways to become familiar with the Family Editor is to open an existing family - investigate how it was built and what parameters or formulas were used. Start by watching the effect of changing parameters. After becoming comfortable with existing families, try making a new family. Users will soon come to realize and appreciate the full power of the parametric technology inherent in Autodesk Revit.
Final Review
Steps to create a family in Autodesk Revit:
system for design thinking and form making. A powerful feature in the Revit suite of products,
families help users manage data and make changes easily. This white paper examines Best Practices relating to Autodesk Revit Families.
Revit Parametric Components are called families because one family type can contain many variations. A family can be anything in Autodesk Revit software, from a table to a window to a two-dimensional representation of an anchor bolt. Any item that may need to be represented in a project can be created in a family.
A large number of predefined families are included with Revit. Manufacturers are creating Autodesk Revit Families that are available from their websites or included on product disks. Despite the availability of large family libraries, users sometimes need to create custom components for a project. This can be easily accomplished using the Autodesk Revit Family Editor; a simple graphical interface that allows users to model any object and apply the power of parametrics to that object.
Users do not need to know any programming language to create content for Autodesk Revit. Family creation is made easy through the use of templates, which are provided with the software to help users get started with families. These templates allow Revit users to focus on the geometry of the object, as they contain all the programming necessary “behind the scene”.
Autodesk Revit Families are extremely powerful because they are driven by the Revit parametric change engine. The parametric change engine enables a change made to a family to propagate throughout the entire project. Once created, a family’s parameters remain exposed and can be edited directly within the Revit project. Ultimately, it is the parameters that drive a family’s geometry. Mathematical formulas can be used in these parameters to create complicated geometry, or to drive parameters in a user defined solution (for example, using a formula in a window family that always makes the width of the window twice its height).
Revit Families also feature nested families - one family residing in another family. For example, a user might nest a door hardware family into a door family. Nested families add a level of strength and capacity to the process. Users can create a single family file that includes dozens of different options.
This paper explores the use of families in Autodesk Revit - from the basics of the Family Editor to advanced topics and considerations when using families - all of which will provide the reader with a Best Practices approach to creating parametric component families in Revit.
Design Considerations
Before creating a family in Revit, users should consider the following questions regarding their intended use of a family:
- What size(s) does this family come in?
Is this a custom piece of furniture that only comes in one configuration, or is this a window that is available in several preset sizes? Perhaps, this is a bookshelf that can be built in any length from between 2’-0” to 5’-0” wide. This is an important point to consider before building a family, as it will dictate decisions that need to be made in the near future.
- How should this family appear in different views?
Is this an object that should be seen from plan view, elevation view, and/or sectional views? Maybe this is a 2D object that should only be seen in plan or elevation. In any case, the way that this object should appear in views will determine how to define its visibility.
- Does this family require a host?
Is this family typically attached to another design element - a wall, or maybe a ceiling? Possibly it is a roof mounted mechanical unit. How this family is hosted (or what it does or does not attach to) will determine which template file should be used to start the family.
- How much detail should be modeled?
Is this family an electrical wall outlet that will only be seen in interior elevations from a distance, or is it a door family with raised panels and a sidelight that will be seen in an interior rendering of the project? This determination will help decide how much detail to provide in the family.
- Where should the origin point be?
Is this a column family that would use the center of the circular base as the insertion point, or is this an accessible toilet that must always be placed 18 inches off the adjacent wall to meet code? This decision will help users when they start placing geometry.Recapping these important first questions to consider before creating a family:
- What sizes does the family come in?
- How does this family appear in different views?
- What hosts might this family be attached to?
- How detailed should this family be?
- What is the origin point of this family?
Once the basic questions listed above are considered, a user is ready to create a new family. There are three types of Autodesk Revit families:
- System families,
- In-place families, and
- Standard component families.
In-place families are components that are created specifically for a single project only. They are created from within the current project, and cannot be used in other concurrent or future projects. The best time to use an in-place family over a standard component family is when creating a component unique to a specific project. For instance: a reception desk in the lobby of a law firm may have a very unique design featuring curving shapes requested by the client and finishes unique to that lobby. In this situation, an in-place family should be used because there is little chance that this custom-designed piece will be repeated in another project.
Standard component families are the most common families in Autodesk Revit, and are the focus of the remainder of this paper. Standard component families can be placed in project template files so that they preload with each new project, or they can reside in libraries to be loaded on demand.
While working in the Family Editor, users can: 1) open an existing family and modify it to suit their needs, or 2) start a new family using the appropriate template. To start a new family, choose the File pull down menu and then select New >> Family.
TIP: To save time, users should duplicate and modify a similar existing family to suit their needs instead of starting a new family from a template.
Templates
Templates for family creation are supplied with Autodesk Revit. The various templates cover a broad range of possibilities from 2D annotation objects to 3D roof-based spot lights. Each template has been pre-configured to aid in the construction of a specific object type.
Figure 1
Autodesk Revit includes many templates to create families of parametric components.
Some templates have a combination of reference planes and pre-defined parameters to guide users during creation. Family templates for hosted objects will contain a host to build from. For example, in roof-based families a portion of a roof will be exposed in the template for the user to reference as a base. Still other templates have text notes embedded in them that may define the interior and exterior faces of a wall.
Another item that is found in some family templates are controls. Controls placed in families allow the user to change the position of the geometry in a family after it’s loaded into the project. An example of these controls can be seen in a door family, where controls allow the swing and the hinge-side of the door to be reversed.
Figure 2
The template for a door family includes controls to easily reverse the swing and hinge-side of the
door..
To create a family based on a template, browse the list of templates, and choose the one most appropriate to the object being built. If the object does not fall into a specific category, the Generic Model template may be the best choice. After picking the template, the user is ready to launch the Family Editor.
Family Editor
The Family Editor is built into Revit, and is launched by opening an existing family (those with an RFA extension) or by starting a new family from within Revit. The Family Editor launches within the Revit application, and employs the same user interface. The Design Bar on the left of the drawing window changes to a unique set of tools for family creation, and the Project Browser updates to show specific views depending on template selection.
Figure 3
The Family Editor user interface matches the general Revit user interface.
At a minimum, the drawing window will display two crossing Reference Planes - and possibly some dimensions, text, and notes to the designer. The crossing Reference Planes are important because they define the origin of the family. It’s a Revit Best Practice to leave these existing items (preloaded from the family template) alone. Users should not move or delete these items, as they play an important role in the family. In fact, there are some items (such as dimensions) in some family templates that cannot be deleted by the user - underscoring the general principal that if an item is in the template when it's first opened, it should be left there.
Reference Planes
A common mistake among users is to start adding objects and solids at this point. While it’s almost time to start modeling, there is still some more preparation that will later serve a significant purpose. After opening the template, the first thing a user should do - before creating model geometry - is use Reference Planes and Reference Lines to create construction lines for the geometry that will be added later.
Start in a view that best fits the family being created, such as a plan or elevation. Reference Planes should be used as datum lines that extend beyond the edges of the visible drawing area. Drawing a reference plane (often called ref planes) in a plan view will also cause that same reference plane to be seen in a crossing elevation or section view, because it is literally a plane that extends in a horizontal and vertical direction simultaneously.
Figure 4
Reference Planes should be defined before creating geometry.
Unlike reference lines, reference planes do not have “defined” endpoints. They consist of two associated planes: one parallel to the view and one perpendicular. Ref Lines can be used in rotational control of families, because the endpoint can be constrained. Reference Lines and Planes can be renamed, so that users can easily refer to them at another time.
Creating Parameters
Reference planes that have been laid out should align with the major axes of the planned geometry. Users should begin to add dimensions to specify parametric component geometry. Start by thinking how the object should be controlled. Height, width, and depth are three dimensions often used in families, and these dimensions and parameters are pre-loaded with many of the templates. Users may need to add more dimensions to describe other geometry - for instance; trim, width, and depth are common in a Window family.
Once the dimensions have been added for the major pieces, users can start adding labels to dimensions, creating parameters. There are two categories of parameters: instance parameters and type parameters. Changing an instance parameter affects the parameters of a single entity (or instance) of an object. Changing a type parameter affects all parameters of the same type.
If there are several instances of the same family loaded into a project, and each individual representation of that family needs to be a different length, then use instance parameters. For example, consider two counter tops in the same project. One instance of the counter top is placed and its length (an instance parameter) is set to 5’ – 0”. A second counter top is placed and its length (an instance parameter) is set to 5’ – 5 ¼”, spanning the distance between two walls. The instance parameters easily allow these two counter tops to be set to different lengths. Instance parameters have another unique characteristic: dimensions that are controlled by instance parameters will display shape handles when selected in a Revit project. Shape handles allow the user to click and stretch the shape of a family to a new position or size by using the mouse.
Figure 5
Instance parameters display shape handles (shown here in blue), a convenient way to stretch the shape of a family.
Type parameters control families at a higher level. They control the predefined types of families used in the project. Use type parameters to load an object repeatedly in a project and control those repeated objects as if they were one. For example, consider a door family. A users places a door repeatedly in the model as a 6’-8” tall door, but later decides to change the height of all the doors to 7’-0”. Changing one type parameter will cause all of these doors to update their height simultaneously.
To add a parameter, click on a dimension then add a label. Once the dimension is labeled, it becomes a parameter. In the Options Bar, a drop down list of available parameters will appear. If the parameter needed is not available, select Add Parameter. When adding a new parameter, specify whether it's an instance or type parameter. After adding the parameter, the dimension changes to include the parameter name and the dimensional length.
Figure 6
Add a new parameter using the Revit Family editor.
As parameters are created, they are added to the parameter list in the Family Types dialogue box (selecting by clicking Family Types in the Design Bar). This Family Types dialogue box contains several key areas. Most noticeable is the list of defined parameters in the main window, arranged into logical parameter groups (Construction, Dimensions, and Identity Data in the example in Figure 7). During creation or editing, users can assign which category is assigned to a parameter.
Figure 7
Family parameters are listed in the Family Types dialog box.
On the right side of the dialog box, users can create new Family Types, or rename or delete existing Family Types. Revit features Family Types to predefine a set of parameters - making a particular “type” of object.
Returning to the door family as an example, several door types can be defined in this dialog box. One type might be a “3068” door (a door that is 30” wide and 6’-8” tall). Another type might be a “3668” (36” wide and 6’-8” tall). A user could then define a “3070” and a “3670” door in this dialog box. Family Types allow Revit users to quickly define a multitude of sizes and combinations of an object, based on just one family and one set of parameters.
The lower group of three buttons in the Family Types dialog box is specifically for parameter creation; Add, Modify, and Remove. Click the Add button to launch the Parameter Properties dialog box to add a parameter to this family.
Notice the Parameter Types section of this Parameter Properties dialog box (see Figure 8). There are two types of parameters available in Revit: family parameters and shared parameters. A family parameter is specific only to this particular object and its value cannot appear in a schedule or tag. A shared parameter can be shared across multiple families and projects. Its value can appear in schedules and tags, and can also be exported out to ODBC. Family parameters are stored within the family file, whereas shared parameters are saved in an external text (TXT) file, typically on a network where other users can access the text file to use the shared parameters.
Figure 8
Family parameters are listed in the Family Types dialog box.
Parameter data for a family parameter is entered in the Parameter Properties dialog box.:
- Name: The parameter's name is completely left to the user. It’s a Revit Best Practice to keep these names simple, short, and concise whenever possible. When using formulas (described later in this paper), these parameter names will have to be retyped exactly as entered here.
- Discipline: A parameter's discipline can be set to Common or Structural.
- Type: This drop-down list contains several pre-defined categories for the value of the parameter, such as Text or Number, or Yes/No.
- Group Parameter Under: This area allows users to classify the parameter in a logical grouping. When the family appears in a project, the parameters are listed in groups of common elements to make it easier to enter the data by logical groups.
- Instance and Type. Select the radio buttons that best fits the parameter.
To change the parameter, users can click the Modify button, or remove the parameter from the family entirely with the Remove button. Continue to add additional parameters by repeating the steps above to complete the design of the family.
Testing the Family
Before finishing a family, it’s very important to "flex" or test the model - to check that the elements created are reacting as expected when parameters change. Users should develop a habit of flexing the model repeatedly when creating families, especially after adding parameters.
To flex the model, click the Family Types button in the Design Bar. In the Family Types dialog box, the various parameters of the object are listed. Pick a parameter, and change the dimension value associated with it, then click Apply and see how the model changes. The intention is to see if the reference planes have moved to a new position as expected. Change the parameters to a range of numbers (clicking Apply each time) to test a range of values from which the family would normally operate - to assure the planes are moving to the correct lengths and dimensions.
Occasionally a user will see an error such as “Constraints not Satisfied.” This usually means that the parameter is trying to control a part that is already constrained by another parameter. As more parameters are added to the model, be sure to flex multiple parameters to test them. For instance, if flexing the width works well, then set a new width, and flex the height. Try different combinations to assure all is moving as expected.
Once a user is satisfied that reference planes, dimensions, and parameters are all working as expected, it's finally time to add some real geometry in the form of Solids and Voids.
Adding Geometry
There are several choices for creating geometry in Revit: Extrusions, Blends, Sweeps, and Revolves. These four geometry types can either be solids or voids. The type of geometry used depends on what is being modeled. For example, in a door family, the door panel itself could be an extrusion of a rectangular shape. The door frame could be a sweep - a profile in the shape of the door frame would be swept along a path defined by the sides and top of the door opening. The door knob might be a revolve. A void-blend could be used to cut the raised panel into the surface of the door panel.
The method for adding geometry is similar for all geometry types. The rest of this section will use extrusions as an example. From the Design Bar in the Family editor, choose Solid, then Extrusion. Revit will switch to Sketch Mode, and the user will have two options for sketching a shape. The first option is to draw the shape using tools from the Options Bar such as Line, Arc, Circle, Polygon, etc. The second option is to use the Pick tool from the Options Bar to pick reference planes, lines, or other existing geometry. As the user begins to draw or pick, magenta sketch lines appear. These lines could be drawn over the top of the reference planes, or more loosely sketched and then moved into alignment with the reference planes. The key is to make these sketch lines lock to the reference planes.
Using the Pick tool, the user has the option to lock the sketch lines upon placement. Blue padlock symbols will appear when lines can be locked to other geometry, lines, or reference planes. To lock and unlock relationships, simply click the lock symbol to toggle it opened (unlocked) and closed (locked). Sketch lines can be moved using a 'press and drag' technique; clicking on the line and moving the mouse while holding down the mouse button. When using this method, notice that sketch lines will automatically snap to reference planes and other relationships while being moved. Moving a sketch line off and back onto a reference plane will cause the lock symbol to appear, allowing the user to choose to lock it or not. The Align tool also allows the user to create constraints using the lock symbols.
TIP: When flexing the model, move the dialog box to the side of the screen, to better see the family in the drawing area.
After sketching the shape, and locking the sketch to the appropriate reference planes, the Extrusion properties in the Design Bar are used to define the thickness of the extrusion. This number can also be set in the Options Bar. When satisfied, click Finish Sketch and the geometry will appear. Flex the model again from various views, including 3D, to make sure the geometry behaves as expected. If it doesn’t, highlight the geometry and stretch it, using the blue shape handles that appear, to align and constrain to a reference plane.
Formulas
Formulas are one of the many powerful aspects of Revit Families - used to control families in a variety of ways. Formulas can use logic such as IF statements (IF the width is 1’-0”, set the height to 4’-0”) as well as mathematical expressions. They can be used to control Yes/No parameters, and to control parametric arrays.
Formulas are typed directly into the Family Types dialog box, where all of the parameters for a family are listed. Simply place a formula into the cell adjacent to the value, beginning with an equal sign. When entering a formula, abbreviations (such as +, *, sin, and so forth) can be used.
The following are valid formula abbreviations:
+ Addition
- Subtraction
* Multiplication
/ Division
^ Exponentiation, i.e. x^y = x raised to the power of y
log Logarithm
sqrt Square root, i.e. sqrt(16)
sin Sine
cos Cosine
tan Tangent
asin Arcsine
acos Arccosine
atan Arctangent
exp e raised to an x power
abs Absolute Value
Referring back to the family parameters listed in the Family Types dialog box in Figure 7, notice that there are parameters for height and width. In the figure, the height = 4’-0” and width = 3’-0”. To set the width of this family to always be one half the height, click in the Formula column of the width parameter and enter “=Height/2”. The values are case sensitive, and must be typed exactly as they are defined. This is why it is important, when naming parameters, to be concise about the name chosen (as described above in the Creating Parameters section). Test how formulas work by changing the value of height, and watching the width value change automatically.
There are many complex mathematical functions that can be used. Logical functions include IF, AND, OR, and NOT statements. Formulas can also use greater than/less than signs (< >). Experimenting with formulas will allow users to create some very powerful Revit Families, such as a book shelf that automatically adds support brackets as the length of the shelf increases or a window family where the muntins turn off when the window size decreases beyond a defined limit.
Saving a Revit Family
When the Revit Family is ready to be used in a project, save the family with an appropriate name, and store it in a location that is easy to find. A Best Practices tip is to organize family content into a system that mimics the Revit Library. This makes it much easier for users to find what they're looking for.
To load the family into a project, select File >> Load From Library >> Load Family, and then browse to the saved file and select it. Alternately, for many component types, when the tool is selected, a Load button becomes active in the Design Bar.
Create a keyboard shortcut to automatically open the Load Family dialog box, or click the Load button in the Options Bar for many component types such as doors and windows when the tool is selected in the Design Bar.
Once loaded into a project, the family can be moved and copied as needed. To edit the family, simply select the object, and click the Edit Family button in the Options Bar. This will launch the Family Editor and open the selected family. When finished editing, the family can be loaded directly back into the project by clicking the Load into Project button in the Design Bar. Saving the family from the Family Editor using this method will overwrite the file that was originally the source for the object in the project. Simply modifying and reloading without saving will update ONLY the project into which the family is loaded.
There are many resources available if users need assistance or are have problems with Autodesk Revit families. First, file a Support Request through the Help Menu in Revit. This puts users directly in touch with the Autodesk Revit team for assistance. The Revit Forums at AUGI.com are also an invaluable resource. Membership is free and there are thousands of people from around the world logged in 24 hours a day - ready and willing to help.
Summary
Autodesk Revit Families and the Family Editor are extremely powerful. One of the best ways to become familiar with the Family Editor is to open an existing family - investigate how it was built and what parameters or formulas were used. Start by watching the effect of changing parameters. After becoming comfortable with existing families, try making a new family. Users will soon come to realize and appreciate the full power of the parametric technology inherent in Autodesk Revit.
Final Review
Steps to create a family in Autodesk Revit:
- Select the appropriate family template.
- Lay out reference planes to aid in drawing component geometry.
- Add dimensions to specify parametric component geometry
- Add labels to dimensions to create type or instance parameters.
- Flex the new model to verify correct component behavior.
- Add geometry in Solids and Voids, locked to reference planes.
- Specify 2D and 3D geometry display characteristics with sub-category and entity visibility settings.
- Define family type variations by specifying different parameters.
- Save the newly-defined family, then load it into a new project and see how it performs.
Subscribe to:
Posts (Atom)