Revit MEP

Revit MEP

Tuesday, September 30, 2008

Revit MEP 2009 64bit Release

Go login to your subscription site and all of the Revit Platforms have been released in 64-bit.
When you go there, you will also notice that there are updated 64 bit extensions for Globe Link, Worksharing Monitor, and Batch Print Utility.


"In every single test I threw at the Revit Structure for the 64-bit system it beat the 32-bit system," said Ken Murphy, BIM manager, Thornton Tomasetti. "On average, we observed approximately a 20 percent performance gain on operations such as saving files and exporting models to other formats for outside consultants. And when it comes to rendering images of large project models, such as an American football stadium with thousands of members, we saw up to a 50 percent performance improvement over the 32-bit platform."


"With 64-bit Revit Architecture we can completely load a very large project into a session and work on it at one time; and that is something that represents a significant efficiency improvement over the 32-bit environment," said Lonnie Cumpton, Revit task force manager for the Friedmutter Group. "For example, we have a large project that consists of 2.9 gigabytes of Revit data contained in 22 individual files. With 64-bit Revit Architecture we can link all the pieces together into one big model and cut an entire building section to gain an understanding from a section elevation standpoint of the entire project at one time. Using 32-bit Revit Architecture we'd have to cut individual pieces of sections in each model and then piece them back together. It took us a day to do that. Now we can do it in less than an hour."


"We've been beta testing the 64-bit Revit Structure software and the increases in efficiency and productivity are impressive," said Jamie Richardson, Associate & CAD manager, Ericksen Roed & Associates. "Cutting sections and switching between views is much faster. Moving within the views and rotating the model in a 3D view is also noticeably faster and smoother. With what we have seen in our beta testing, and what we're hearing from users testing the beta on their current projects, we see no reason not to go to the 64-bit version of Revit Structure."


Welcome to the 64‐bit edition of Revit® 2009 platform products. This release takes advantage of the additional memory available to applications in a 64‐bit operating system environment. 32‐bit Microsoft® Windows® operating systems, when properly configured, are limited to providing between 3GB and 4GB of memory to applications. From a software standpoint, there is no practical technical limit to the amount of memory available to compatible applications under 64‐bit Microsoft Windows operating systems, although the hardware platform may impose some technical restrictions on the amount of RAM that may be installed in a given workstation.

Performance
Revit 2009 platform 64‐bit product performance is expected to be similar to an identical Revit model edited with Revit 2009 platform 32‐bit products. However, due to the potential for the Revit platform to access greater quantities of memory made available by the Windows operating system running with more installed RAM, the Revit platform may exhibit increased stability.

Model Size
With hardware configured in the manner listed in the System Recommendations section, it may be possible to edit Revit models of greater size than is practical within the 32‐bit version of the Revit 2009 platform. It should be noted that Revit models whose memory requirements exceed the RAM available in a 32‐bit operating environment may not open in the 32‐bit version of Revit 2009 platform.

AddIns
Non‐Autodesk external commands and applications designed to access the Revit platform may not be compatible with Revit 2009 64‐bit platform.

Limitations
As of this Revit release, Microsoft has not made available ODBC (Open Database Connectivity) drivers for its 64‐bit operating systems. Consequently, the Revit 64‐bit platform cannot export a Microsoft® Excel®‐ or Microsoft Access®‐compatible ODBC file.

Friday, September 26, 2008

REVIT MEP 2009 Update #2 Just Released

Web Update #2 is not a full install; rather it is using Service Pack technology similar to AutoCAD based products. Prior to installing the Web Update #2 Service pack, please verify that you have already installed the First Customer Ship build or Web Update #1 build of Revit MEP 2009.

Revit MEP 2009 Web Update #1 Full Install – June 2008 (exe - 711 Mb)

Revit MEP 2009 Web Update #2 Service Pack (exe -– 114 Mb)

Web Update #2 Enhancement List

Improvements made in the current Web Update 2 build (20080915_2100):
Revit MEP 2009 Enhancements
  • Improves performance when modifying customer visibility settings for linked files, when many volumes exist that are bound by the linked file.
  • Improves stability when modifying Panel Schedule Columns on Sheets.
  • Improves stability when using the Convert to Flex tool.
  • Space Elements with a Condition Type defined are now updated after Heating and Cooling Loads are calculated.
  • Roof Elements that exist below the defined Ground Level now export to gbXML as UndergroundCeiling Surface Types.
  • Improved performance when placing a Space that already exists within the Revit project.
  • Improved stability when exporting to gbXML.
  • Improved stability when modeling Ductwork in a Section or Elevation View.
  • The version of the gbXML schema utilized when exporting is now included in the gbXML output.
  • Heating and Cooling Loads results imported via gbXML now report accurate Calculated Heating Load and Calculated Cooling Load values on HVAC Zones.


Revit® Platform Enhancements

  • Improves the ability to link markups made in a DWFx file.
  • Improves the ability to view thumbnail previews in Microsoft® Windows® XP x64.
  • Decal bump image map will now import at correct scale for cut-out.
  • Floors containing multiple slopes and walls will now export to IFC correctly.
  • Improves the display of colors in shaded views to be more consistent with the Revit® 2008 product line.
  • Export to DXF/DWG will now export the Material's color_map texture.
  • Mass Floors no longer disappear when adding text to Mass Element comments.
  • Improves stability of worksharing when saving to central.
  • Improves visibility of common edges when joining in-place family.
  • Improves stability when accessing Pantone dialog.
  • Improves stability when upgrading project or family from the 2008 version of a Revit product line.
  • Improves stability when selecting elements in a 3D view.
  • Moving a model pattern with a face-based family constrained to it no longer causes a constraint error.
  • Improves stability when switching between views.
  • Improves stability when importing DWG files.
  • Improves performance when adding or editing walls in models with rooms.
  • Improves stability when creating a section.
  • When exporting to DWG, the ceiling pattern will now export correctly.
  • After a project is upgraded to the 2009 version of a Revit product, the linework will now display as set in previous version.


API Enhancements

  • By following a modified install procedure, VSTA can now run with non-administrative user permissions. Please see the Revit VSTA User Manual in the Revit SDK package for complete details.
  • MEP Elements now properly return the Space they are located in via the API.


Improvements made in Web Update 1 build (20080602_1900)


During installation you will be prompted for the original installation media, source or a network image. If you installed the original Revit product from the DVD, you will be asked to insert the disk during installation of the service pack. Please have the disk available before starting. If you downloaded and installed Revit from the web and later deleted the extracted files (Installed by default to C:\Program Files\AutoCAD Revit MEP Suite 2009\Download) the service pack will not be able to continue. In that case, you should follow the below procedure:

  1. Obtain the Web download file and save it to your computer.
  2. Double click the download file and allow it to extract its files, noting where they are being saved.
  3. When the Revit Installer screen appears, click "Cancel".
  4. Continue with Service Pack installation as described in the Installation Instructions.

Thursday, September 25, 2008

New AIA Documents Announced

My friend Todd from the CAD Shack has written a blog about the release of new AIA documents which include BIM, IPD, Design Build and Scope of Services documents. Here is a link to Todd's blogs about the announcement.

See the official announcement here.

The new documents will be available electronically in AIA Contract Documents software beginning October 17, 2008, as well as in paper form (E202-2008 will only be available in AIA software). The software allows users to generate and customize Microsoft Word files for easy collaboration and distribution.AIA Contract Documents software can be purchased at www.aia.org/docs. Documents in paper form are available through the AIA’s full service distributors. For a listing of full service distributors and pricing information, please visit www.aia.org/docs_purchase.


AIA Contract Documents
E202™–2008 Building Information Modeling (BIM) Protocol Exhibit

• E202™–2008, written by practitioners from across the industry, provides the contractual structure for managing the use of Building Information Modeling (BIM) across a project. It also is the first AIA document written exclusively to advance the use of BIM on building projects.

• From the outset of a project, E202-2008 creates an environment that encourages model authors to share their models with downstream users, designers, contractors, schedulers, cost estimators and fabricators.

• The E202–2008 is a practical tool for the industry that:

  • Specifies who is responsible for authoring each element of the model at each project phase, so no major design elements are missed or left unaddressed.
  • Defines the extent to which downstream model users, such as contractors and fabricators, can use and rely on the model for scheduling, pricing, fabricating and construction.
  • Assigns management of the model to a specific party by project phase, so there’s no confusion about who is managing the model at any time.
  • Clarifies who owns the model and who has the right to use it.
  • Allows easy modification to add or delete model elements and to revise the required levels of development on a project-by-project basis.
  • Establishes standards and file formats to promote interoperability across the project.
  • Provides common definitions for terms to avoid confusion.

• Through a table the parties complete for each project, E202–2008 assigns authorship of each model element by project phase.

• E202-2008 was written primarily to support a project using Integrated Project Delivery. However, it may also be used on projects delivered by more traditional methods.

• E202-2008 is not a stand-alone document, but must be attached as an exhibit to an existing agreement for design services, construction or material.

Monday, September 22, 2008

Trane Manufacture Revit MEP Family Content Available


Trane has created a few of their Heat pumps and Roof top units in Revit MEP that are parametric and contain the appropriate connectors needed to connect them to logical systems inside of a Revit MEP model. They also contain the correct data needed to schedule the equipment automatically.


Even though there are only 5 families; within each family are a hundred or so family types to choose from. I wonder how long it will take until these show up on Autodesk's Seek Content Web site.

click image to enlarge

You can create a schedule in Revit MEP to schedule the mechanical equipment in your project. The schedule is parametric and will fill itself out based on the mechanical equipment that is placed in the project. The schedule may need to be filtered to show only specific equipment types or type marks.

All columns in the schedule are filled out by the options selected for each unit with the exception of the AIR FLOW CFM. This number is driven by the connected flow of ductwork. The external static pressure and BHP should be manually adjusted after analysis of your duct design.


click image to enlarge

INSTRUCTIONS FOR USING THE MECHANICAL EQUIPMENT FAMILY:
Load the individual family file (Voyager YC 12-25Ton R410A.rfa) that has been provided into your project file. Change the family types and voltages as needed. The remaining options are adjustable via element properties.


click image to enlarge

To specify no curb, un-check the "SHOWCURB" option, for a welded curb select the "SHOWCURB" option, for a spring isolation curb, select both "SHOWCURB" AND "ISOCURB"
to use the economizer and power exhaust options adjust the "1NONE_2ECON_3PWREXH" parameter to one of the following choices:

1 - FOR NONE (TRANE OUTSIDE AIR HOOD ONLY)
2 - FOR AN ECONOMIZER (CANFAB 100% BAROMETRIC RELIEF)
3 - FOR POWER EXHAUST (CANFAB MODULATING POWER EXHAUST)


For both of these option categories, the weight, electrical info and description update in the schedule automatically. For heating capacities other than those specified here, you will need to manually create a new family type and adjust the relevent data.

Download Page

Contact your local commercial Trane sales office for details, or log on to:

www.trane.com/sacramento

www.trane.com/losangeles

www.trane.com/sandiego

Product configurations are packaged together, in Voyager and Precedent files.

Log on, register for updates, and start using the files today, for your building project.

Thursday, September 18, 2008

Design West Engineering Revit MEP Success Story

Autodesk released this latest success story of a company in California that is using Revit MEP. Clients ask me if companies are using this software all the time, and I tell them yes. Not only all over the US, but locally as well. Some companies don't want to be on the leading edge, but we are getting to the tipping point where more companies are using Revit than thinking about using Revit. The key is having a good strategy and a progressive team and support from upper management.

Click Here to go to the full story posted by Autodesk

Undersea design adventure Project.

With Revit® MEP software, Design West Engineering completes construction documents for the SEA LIFE™ Aquariumat LEGOLAND®.


Design West Engineering Customer Success Story
Revit® MEP Revit®
For our clients using Revit Architecture, our original
goal was to produce 100 percent of our construction documents with Revit
MEP and we’ve already accomplished that. It really does help us run a much
tighter project and put a better product into the field. The 3D models give the
entire design team — from the project engineer on down — adramatically improved
understanding of the building. As a result, contractors can build our projects
more easily and with far fewer questions.
Robert Cronk
Principal
Design West Engineering
Firm Summary
Design West Engineering is a mechanical, electrical, and plumbing (MEP) engineering consulting firm based in San Bernardino, California. Established in 2000, the firm delivers services to clients from a wide range of building sectors, including higher education, K–12 schools, religion, and civics. “We’ll tackle almost any type of commercial engineering or energy-efficiency project,” says Robert Cronk, a principal at the firm. “Lately, we’ve also done quite a bit of multifamily residential work.” Until early 2007, Design West relied primarily on AutoCAD® software to deliver exceptional service and designs to its architectural partners. “However, we began to notice that more and more architects were using Revit Architecture software and becoming quite passionate about wanting to collaborate with us via a complete building information model.” As a result, Design West began migrating to Revit MEP software, the intuitive building information modeling (BIM) solution built specifically for MEP engineers and designers.

The Challenge
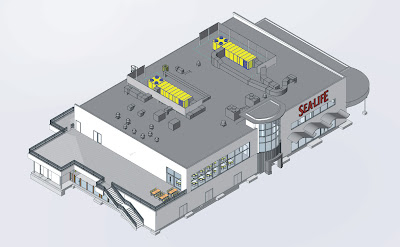
Since adopting Revit MEP, Design West has completed construction documentation on 14 major projects, including the 28,000-squarefoot SEA LIFE Aquarium at LEGOLAND near San Diego, California. “SEA LIFE is designed to introduce children to the wonders of the ocean,” says Cronk. “There’s a whole chain of them across Europe, but this project is their first U.S. venture.”

“The whole park is very heavily themed, with lots of exposed ductwork and piping that must be painted or covered with theming,” says Cronk. When designing SEA LIFE locations throughout Europe, the project architect used Revit® Architecture software. “However, because the MEP engineers on those projects were still using traditional CAD applications, they sent him 2D ductwork drawings. As a result, before the theming contractors could decorate any of the spaces, the architect had to provide interior elevations of every single wall in all of the attraction rooms so they could estimate the proper duct heights.”

Revit MEP provides instant design feedback— not a large set of error-prone documents for after-the-fact examination.

Architects are obviously concerned with aesthetics; our initial requirement is to make sure the system works properly. The Revit platform enables both of us to do our respective jobs better.

Jarrod Baumann
Project Manager
Design West Engineering
The Need for Speed
All of that work was time consuming and not very accurate. Yet the SEA LIFE project was on a fasttrack construction schedule and could not afford any delays or possible design errors. “We broke ground in late November,” says Cronk. “The goal is to have the project fully operational in late June and open to the public in time for the July 4 weekend.”

An Information Disconnect
“In the construction process, there’s often a disconnect between the information we provide the
architects and what they really understand about the ductwork systems,” says Jarrod Baumann, a project manager at Design West. “Often, we don’t resolve that disconnect until after construction begins. With Revit MEP, we hope to greatly increase the architects’ understanding of our projects long before we get to the fi eld. We want them to know exactly where our ducts are going to run and how they’ll interact with a building.”

The Solution
Right from the start, Revit MEP and its intuitive tools for system design and analysis enabled Design West to save valuable time. “The principal architect was absolutely tickled to receive our 3D Revit MEP model,” says Cronk. “He used Revit Architecture to cut a section from every single wall and quickly get all the information the theming team needed to do its job.”

Reduce Design Conflicts
“He was also able to interactively check to make sure no future confl icts existed,” says Cronk. “We already knew that we didn’t have any confl icts with the building structure, but he was able to verify that there would be no problems with the theming and the ductwork. That was a very big benefit.”

Easily Visualize MEP Designs
“Revit MEP also enabled the architects to easily visualize our designs,” says Baumann. “Architects are obviously concerned with aesthetics; our initial requirement is to make sure the system works properly. The Revit platform enables both of us to do our respective jobs better.”

Create More Accurate Designs
“Because the architects can easily see where we want to place a unit, how big it is, and what it looks like, we can quickly make adjustments based on their input,” says Cronk. “Plus, the Revit platform itself gives us instant design feedback rather than a large set of documents that someone has to carefully examine for accuracy much later. That helps us make better decisions and increases the likelihood that our MEP systems will fi t the building in the best possible way.”

Increase Understanding
“As a result, we’re starting to see that the architects have a much better understanding of our discipline,” says Cronk. “To give a specifi c example, one of our clients does a lot of multi-family residential work with Revit Architecture. Those types of buildings have very tight space constraints on the mechanical systems. Using our model, the architects easily produced shafts and soffi ts for ductwork right around the work we gave them. They absolutely loved this capability.”

Build Credibility
“Another benefi t is added credibility with the architects,” says Cronk. “Sometimes it seems as if they think we’re crying wolf when we ask for more duct space. With Revit MEP, we can quickly show them exactly where all of the space is getting chewed up. The whole interaction is more efficient and we’re able to move forward that much faster. That’s a huge benefit.”

Share a Common Model
Design West also worked closely with the SEA LIFE project’s structural engineers. “More often than not, if we have a problem fi tting the ductwork on a project, it involves the structural cavities,” says Baumann. “We used Revit MEP to determine whether we had enough space for ductwork or adequate clearance in various spaces throughout the entire project.”

Clearly Communicate Design Intent
Even on a much smaller scale, Design West has found tremendous benefi t in Revit MEP software’s 3D visualization capabilities. “For example, we recently designed a small retail space,” says Cronk. “The owner was interested in how the different displays were going to look. He was very pleased to be able to sit down in front of the 3D model, interact with it, and see exactly how the space and diff erent light fi xtures would appear in real life.”

Reduce Costs
“Based on what he learned in that meeting, the owner made signifi cant changes to the light fixtures,” says Cronk. “Because he also received some budgetary feedback from the model, he decided to cut costs by changing some of his lighting selections.” Design West also helped one of its architectural clients, WLC Architects, save money on the design of its new 60,000-square-foot offi ce building. “Using the information in our Revit MEP model, the architects were able to determine the actual cost of several different lighting packages and make appropriate budgetary decisions,” says Cronk. “They also chose the fi xtures that looked best in the space.”

Practice Green Design
“That particular offi ce building is going for LEED certification,” says Baumann. “As a firm, we’re
involved in several other sustainable design efforts, such as the Collaborative for High Performance Schools (CHPS), a spinoff of LEED focused primarily on schools. Currently, we’re designing a combination high school and middle school campus. The client wants to score incredibly high on the CHPS checklist and plans on using the Revit platform to accomplish a substantial portion of that.” In particular, Design West is experimenting with exporting geometry from Revit to various software packages for heating/cooling and lighting analysis, such as eQuest, IES Virtual Environment, and AGI 32, either with direct export/import or through GBXML.

Transform Attitudes
Revit MEP software’s 3D capabilities have had a profound impact on contractors. “One of our project managers recently presented 3D designs to a contractor who’s been building multifamily residential homes from 2D documents for more than 20 years,” says Cronk. “At first, he wondered why we’d even bothered to use 3D.”

Maximize Coordination
The fi rm’s ultimate goal is to receive very accurate structural models at the same time that it receives the architectural models. “That really enables us to do our jobs well,” says Baumann. To further minimize design coordination errors on the SEA LIFE project, Design West regularly updated its model via links to the architectural building model, the structural framing model, the aquarium tanks, and the underground tanks.

Intuitively Create MEP Systems
“At one point on the SEA LIFE project, we got into a real time crunch,” says Cronk. “The owners made dramatic changes at a time when we had pressing deadlines on other projects. Because our entire offi ce wasn’t yet trained on Revit MEP, I produced some of the immediate changes in AutoCAD to get us past the hurdle.” Later, when engineers input Cronk’s changes into the Revit model, they quickly noticed several ways to improve the AutoCAD-produced design. “Being able to spin the model on-screen made me feel like I was at the job site discussing ways to save money with the contractor,” says Baumann. “Using Revit MEP, it’s easy to take that kind of step in the office— long before getting to the field.” “But by the end of the meeting, he had to admit
that it really helped him visualize the lighting for the parking lot and courtyards,” says Cronk. “He also admitted that 3D would be even more helpful to someone without his skills. Even with his level of experience, he still thought that 3D was worthwhile— even if it required extra effort.”

Improve Workflows
As a direct result of using Revit MEP, Design West modifi ed its workfl ow in several important
ways. “For one, our project manager and Revit trainer is very quickly moving into the role of BIM manager,” says Cronk. “His job is to oversee the quality and content of the model and to make sure that it works across the entire Revit product family— throughout our office and with our partners.”

Subscribe for Maximum Benefit
After receiving early training at Autodesk University, Design West chose to participate in the Revit MEP subscription program. “There’s definitely a benefit to being able to keep up with the latest release,” says Cronk. “We also get access to additional helpful information and quick responses from the online product support team. Our subscription has been very useful to us; we certainly don’t intend to do it any other way.”
The Result
“We’re really excited,” says Cronk. “Our original goal was to produce 100 percent of our construction documents with Revit MEP for our clients using Revit Architecture and we’ve already accomplished that. It really does help us run a much tighter project and put a better product into the fi eld. The 3D models give the entire design team—from the project engineer on down—a dramatically improved understanding of the building. As a result, contractors can build our projects more easily and with far fewer questions.”


Gain Competitive Advantage
Our marketing director says that the best thing he can tell
an architect is that we use Revit MEP. We’re currently really well positioned in
the marketplace and have a distinct competitive advantage—particularly because
most other MEP firms can’t provide these services yet. We wouldn’t have that
advantage without Revit MEP.

Robert Cronk
Principal
Design West
Engineering

Wednesday, September 10, 2008

Setting Up Default Fittings To Be Used In Revit MEP

You can create and set up a number of different Duct Types and Pipe Types in Revit MEP by editing the properties of those Type families. Within these various Duct/Pipe Types that you create, each type can have their own default fittings that you will use for that Type. The key though, is to make sure that the correct fittings that you want to use are loaded into your project. If the correct fittings are not loaded into the project, you will probably not get the results you are looking for when laying out duct/pipe.

Once you set your Duct and Pipe Types, save those into your project template so that you can reuse those types and fittings for future projects. This will save you time and allow you to do more designing and less setting up.

To set up your pipe types, select a type in the project browser down at the bottom under families, and right-click and duplicate it and rename it with your new name. Then right-click and change the properties. Within the properties dialog box, you can change each fitting that that pipe/duct type will use by default when laying out a system.


Each type can be unique and have different fittings. This speeds up the design process because Revit MEP will automatically place the correct fitting based on the Pipe/Duct type you are using when laying out your routing. You shouldn't have to manually place fittings very often.


This goes not only for manually routing pipe/duct, but also for the automatic layouts that are generated. When you have Revit MEP layout a system for you, in the Settings, you can choose what Pipe/Duct type you want to use, and Revit MEP will automatically place the fittings that you choose to be the defaults for that Pipe/Duct Type.


If you go into the Mechanical Settings under Settings Pull Down menu, you can also create your own piping materials and assign Roughness and set the connection type and assign sizes for your own custom pipe. You can then assign other pipe properties in your pipe types to these custom pipe materials and settings.